How to use Hiaso, from A to Z
Set up your workspace, find realistic keyword opportunities, create stronger App Store metadata, localize your listing, and publish validated prices.
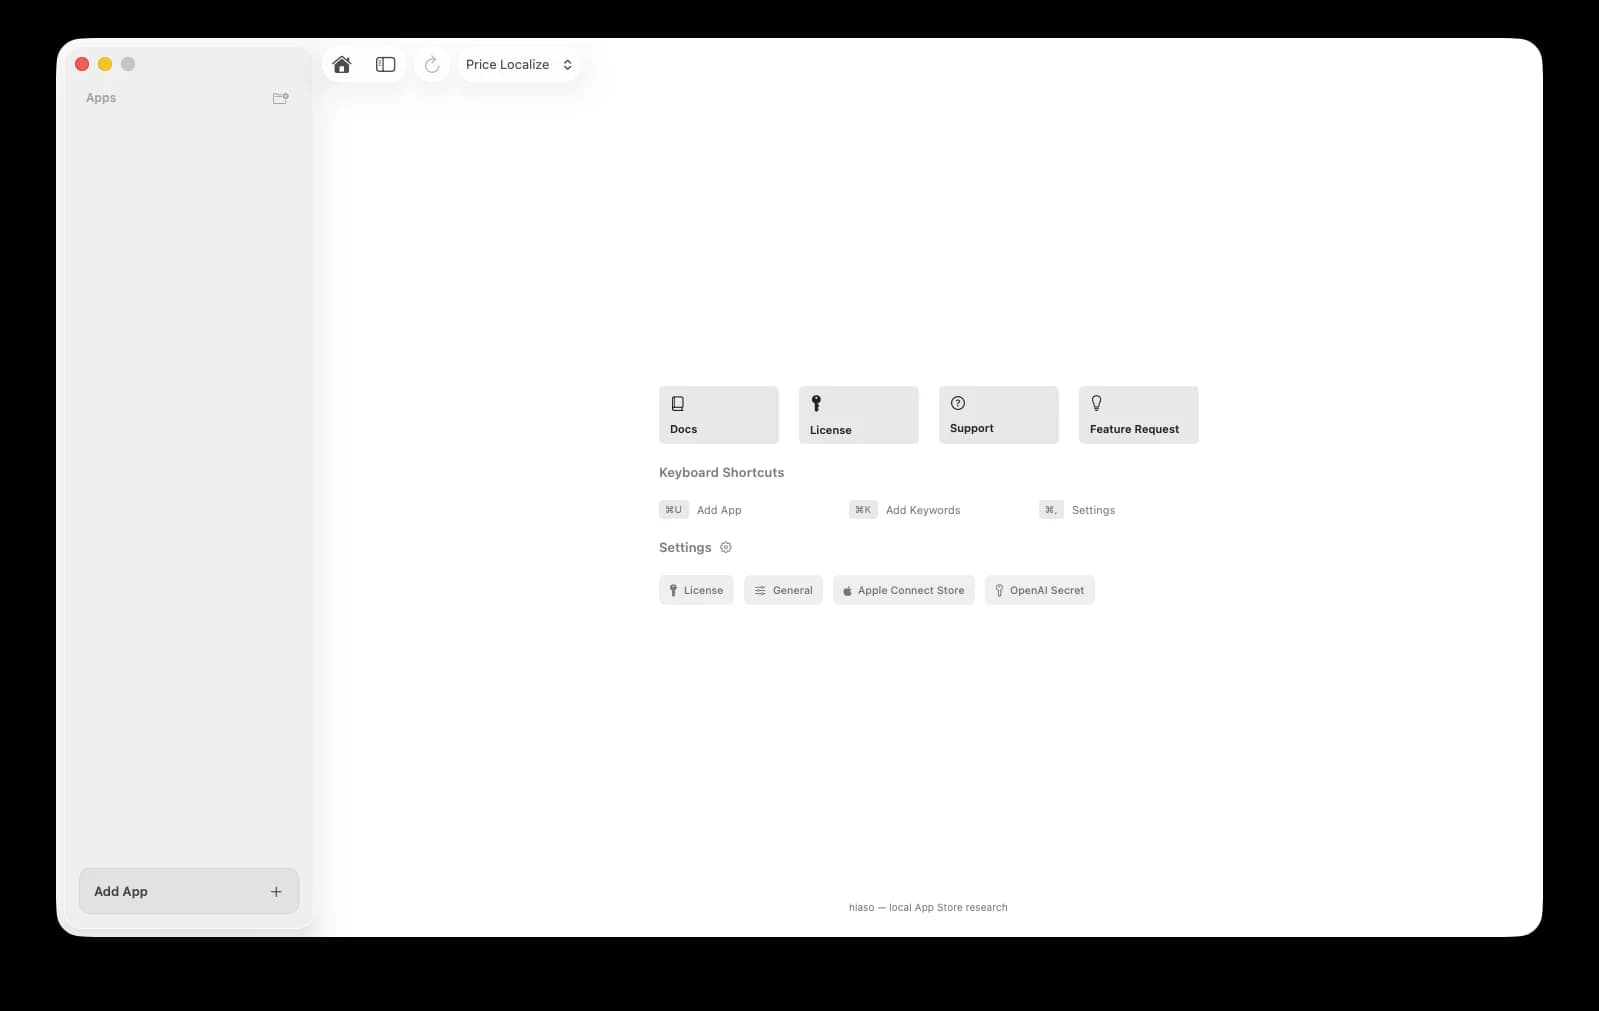
Install Hiaso on a Mac with macOS 14.6 or later and an Apple-silicon processor. Keep your license key nearby. OpenAI and App Store Connect are optional until you use AI writing, translation, validation, or publishing.
Activate your license
Activation unlocks Hiaso’s research, optimization, localization and publishing features on this Mac.
Copy your license key from Whop
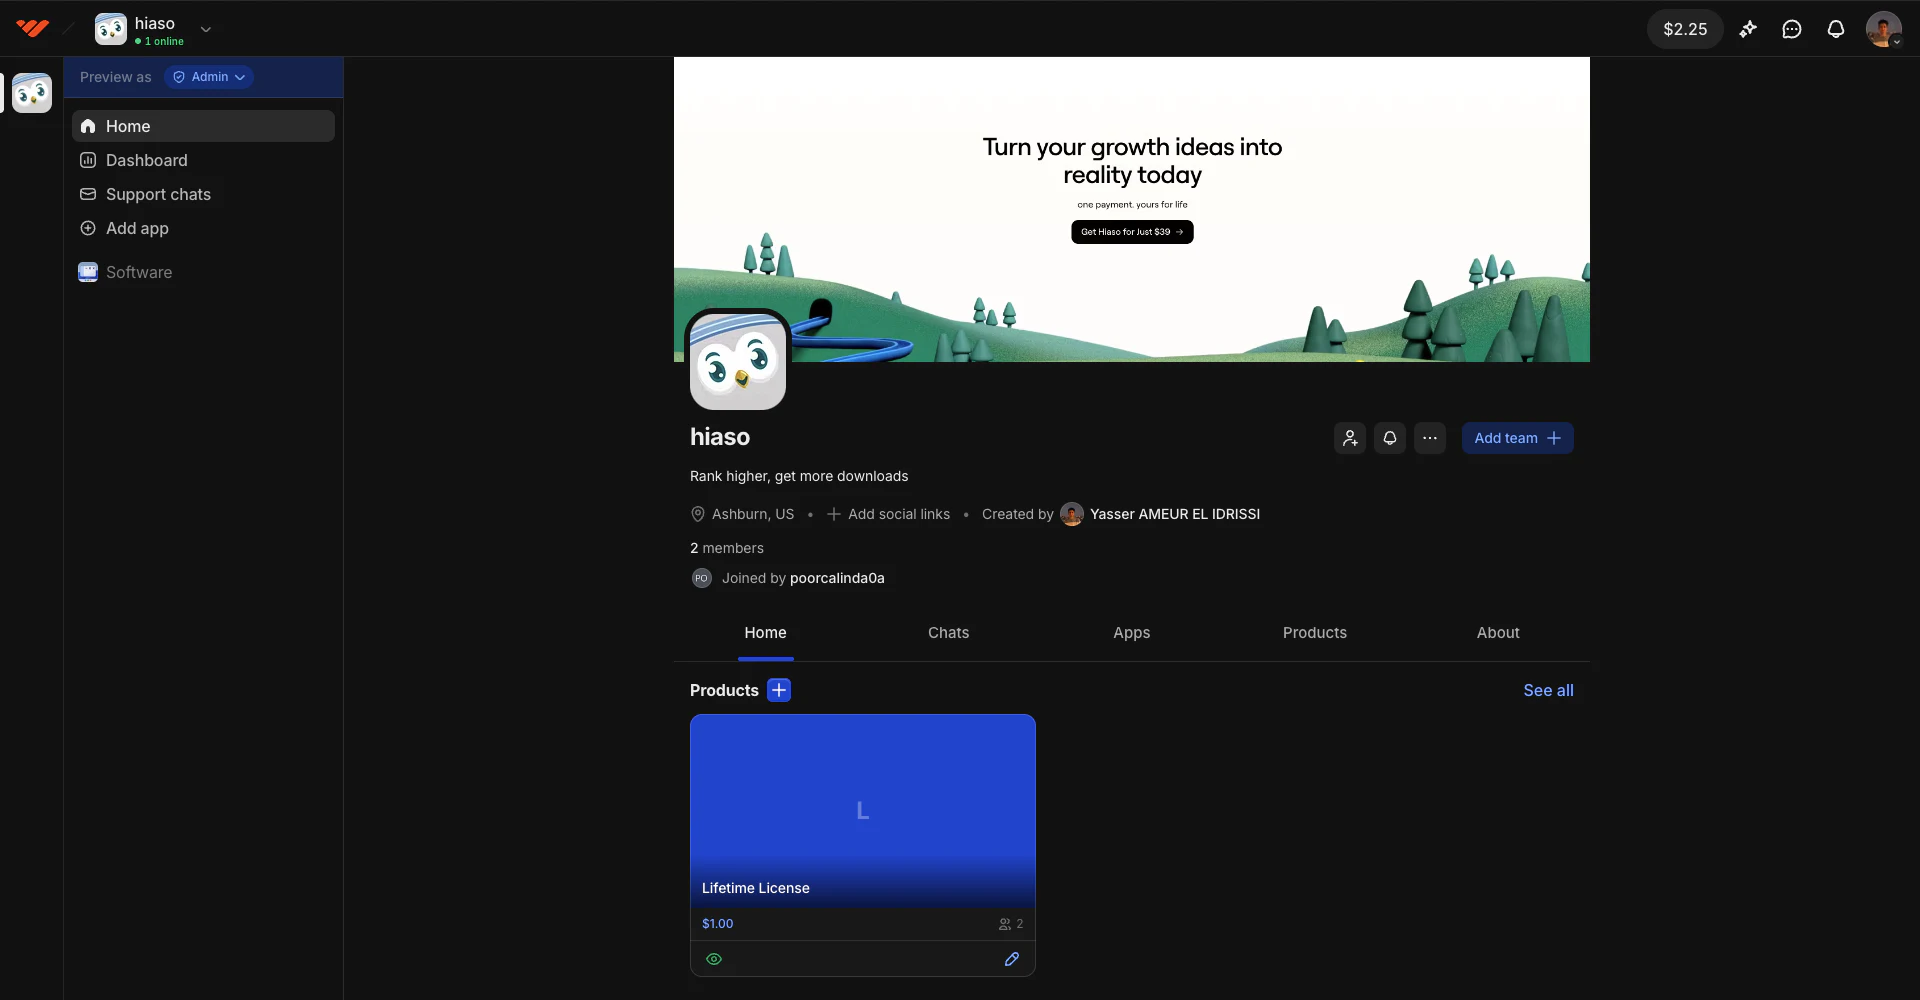
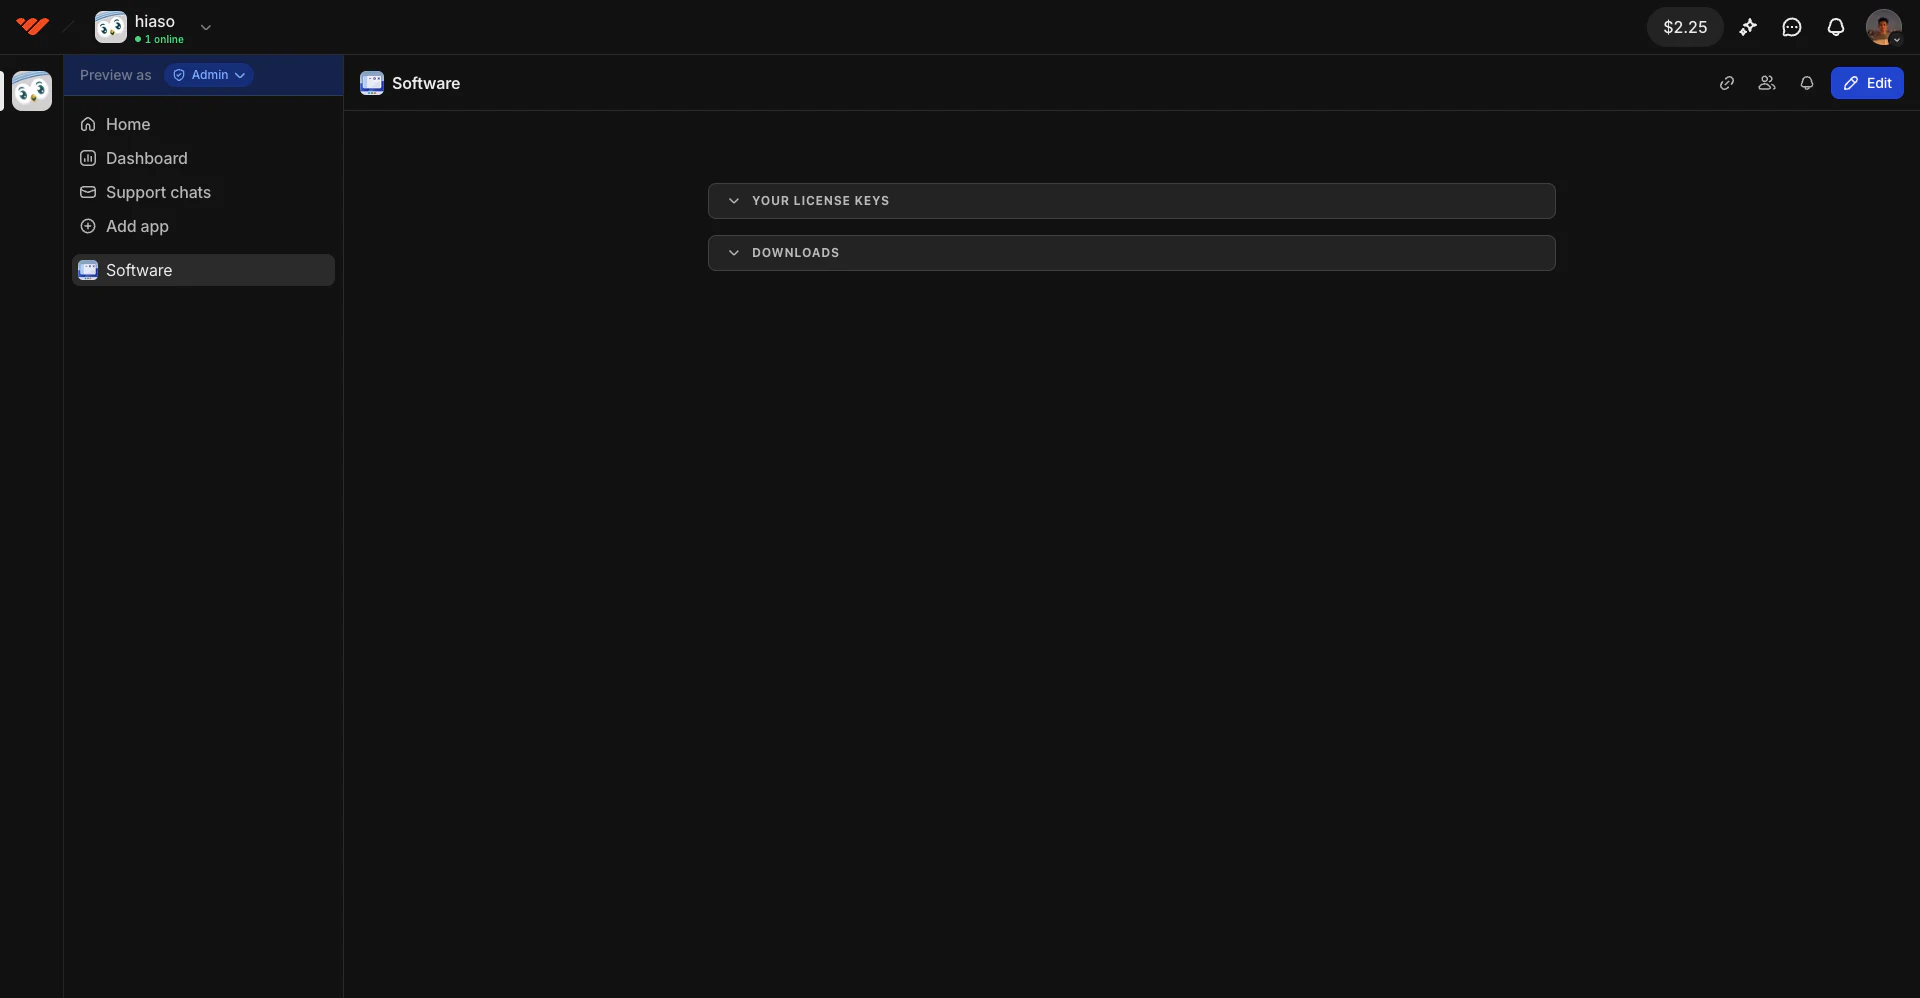
After paying, you will be redirected to the Hiaso customer hub on Whop. Your license key and app download are available in its Software section.
- On the Hiaso page in Whop, select the Software icon in the left sidebar.
- Expand Your License Keys.
- Copy the license key shown there. Keep it private because it unlocks your Hiaso purchase.
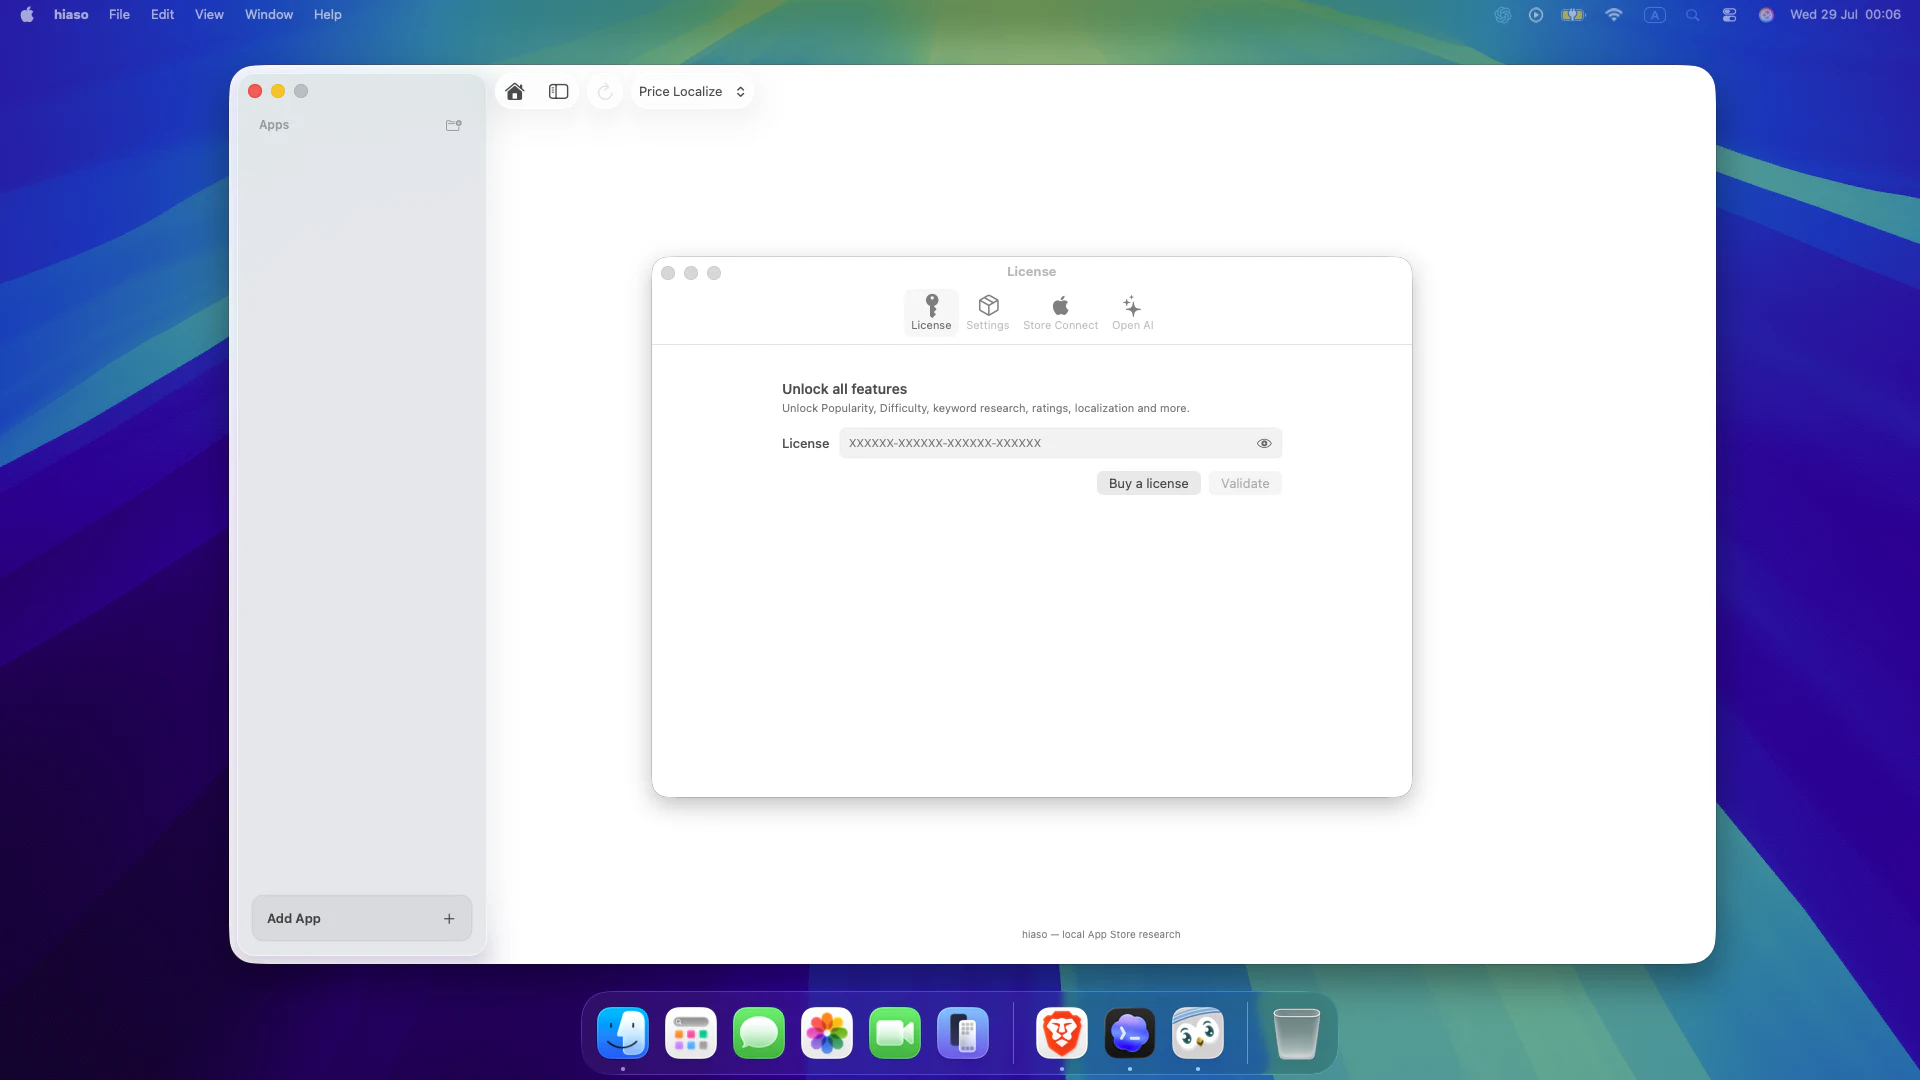
- Open Hiaso and select License from the home screen or Settings.
- Paste the license key you copied from Whop into the License field.
- Select Validate. A successful activation is saved for future launches.
Connect OpenAI for writing and translation
Hiaso uses your own OpenAI API key for metadata packages and multilingual localization. Keyword research and purchasing-power pricing do not require it.
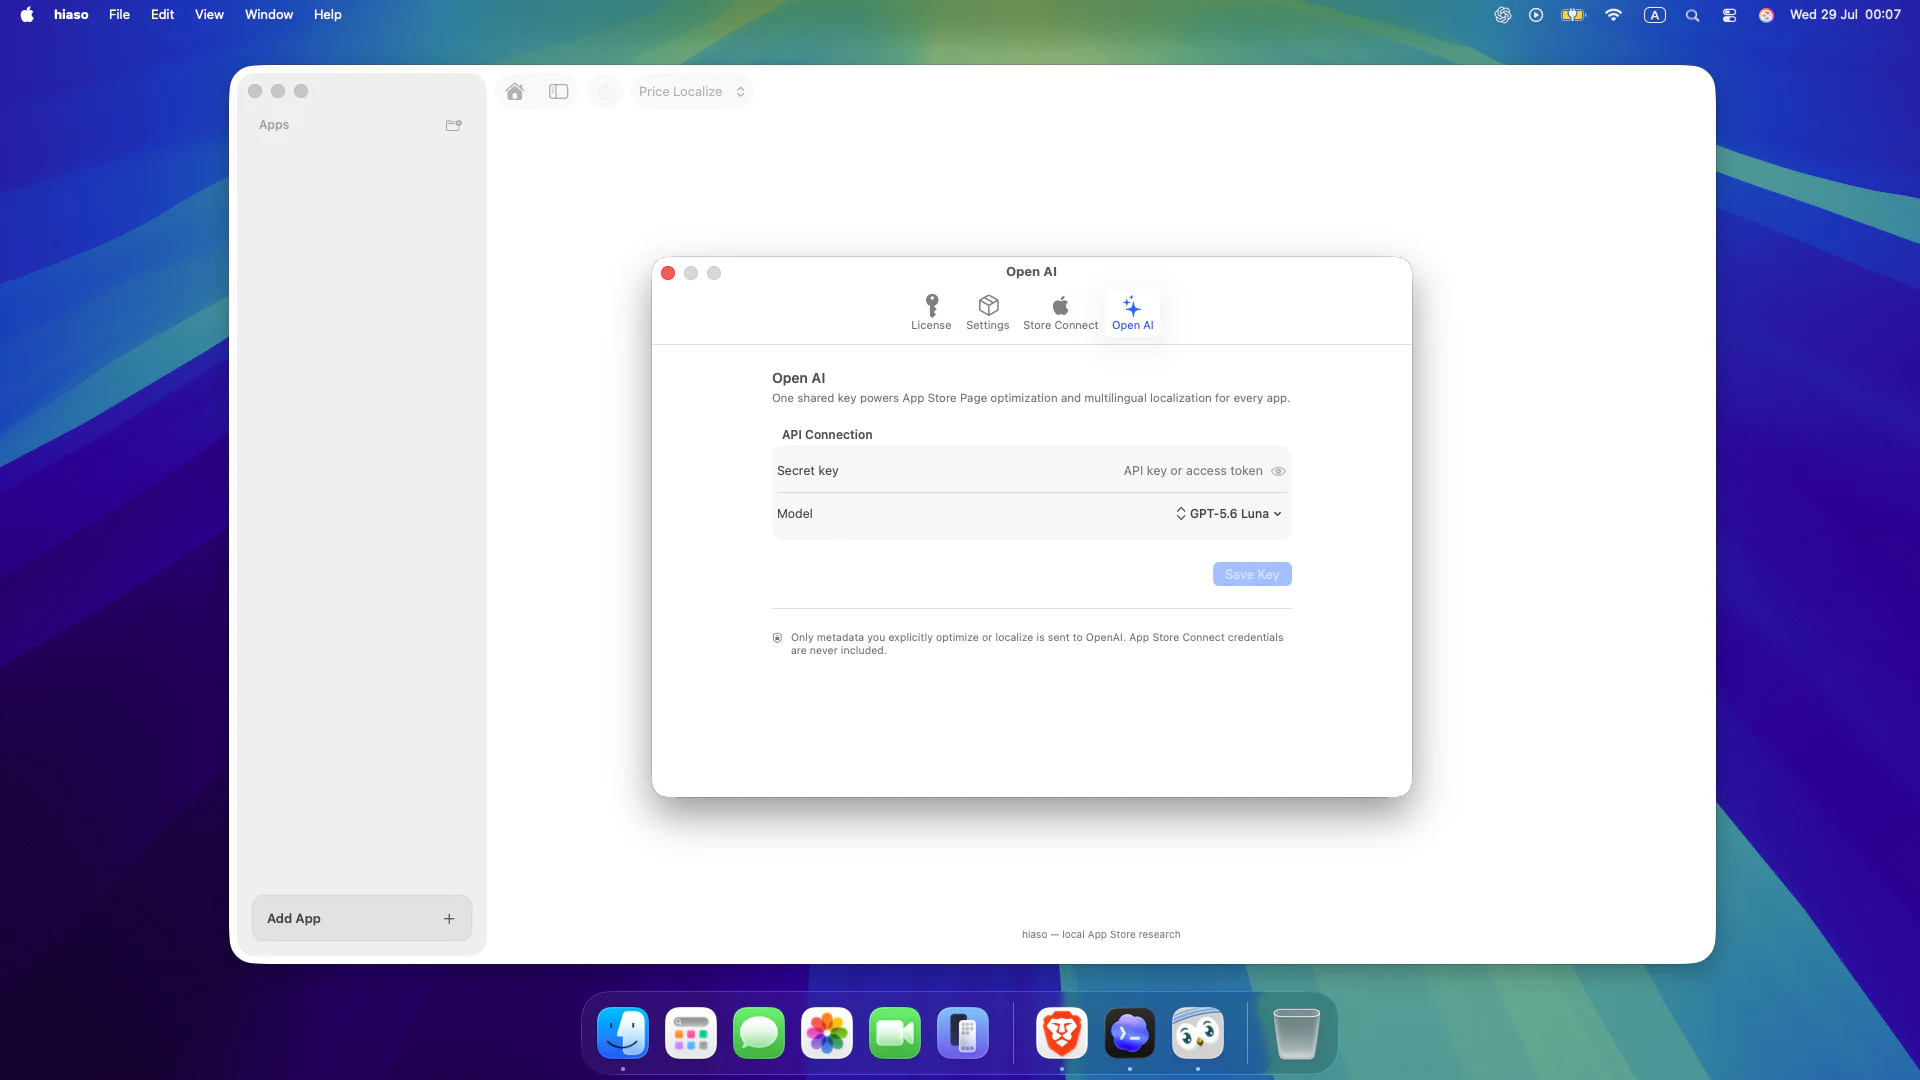
- Open Settings → Open AI.
- Paste your API key, choose an available model, and select Save Key.
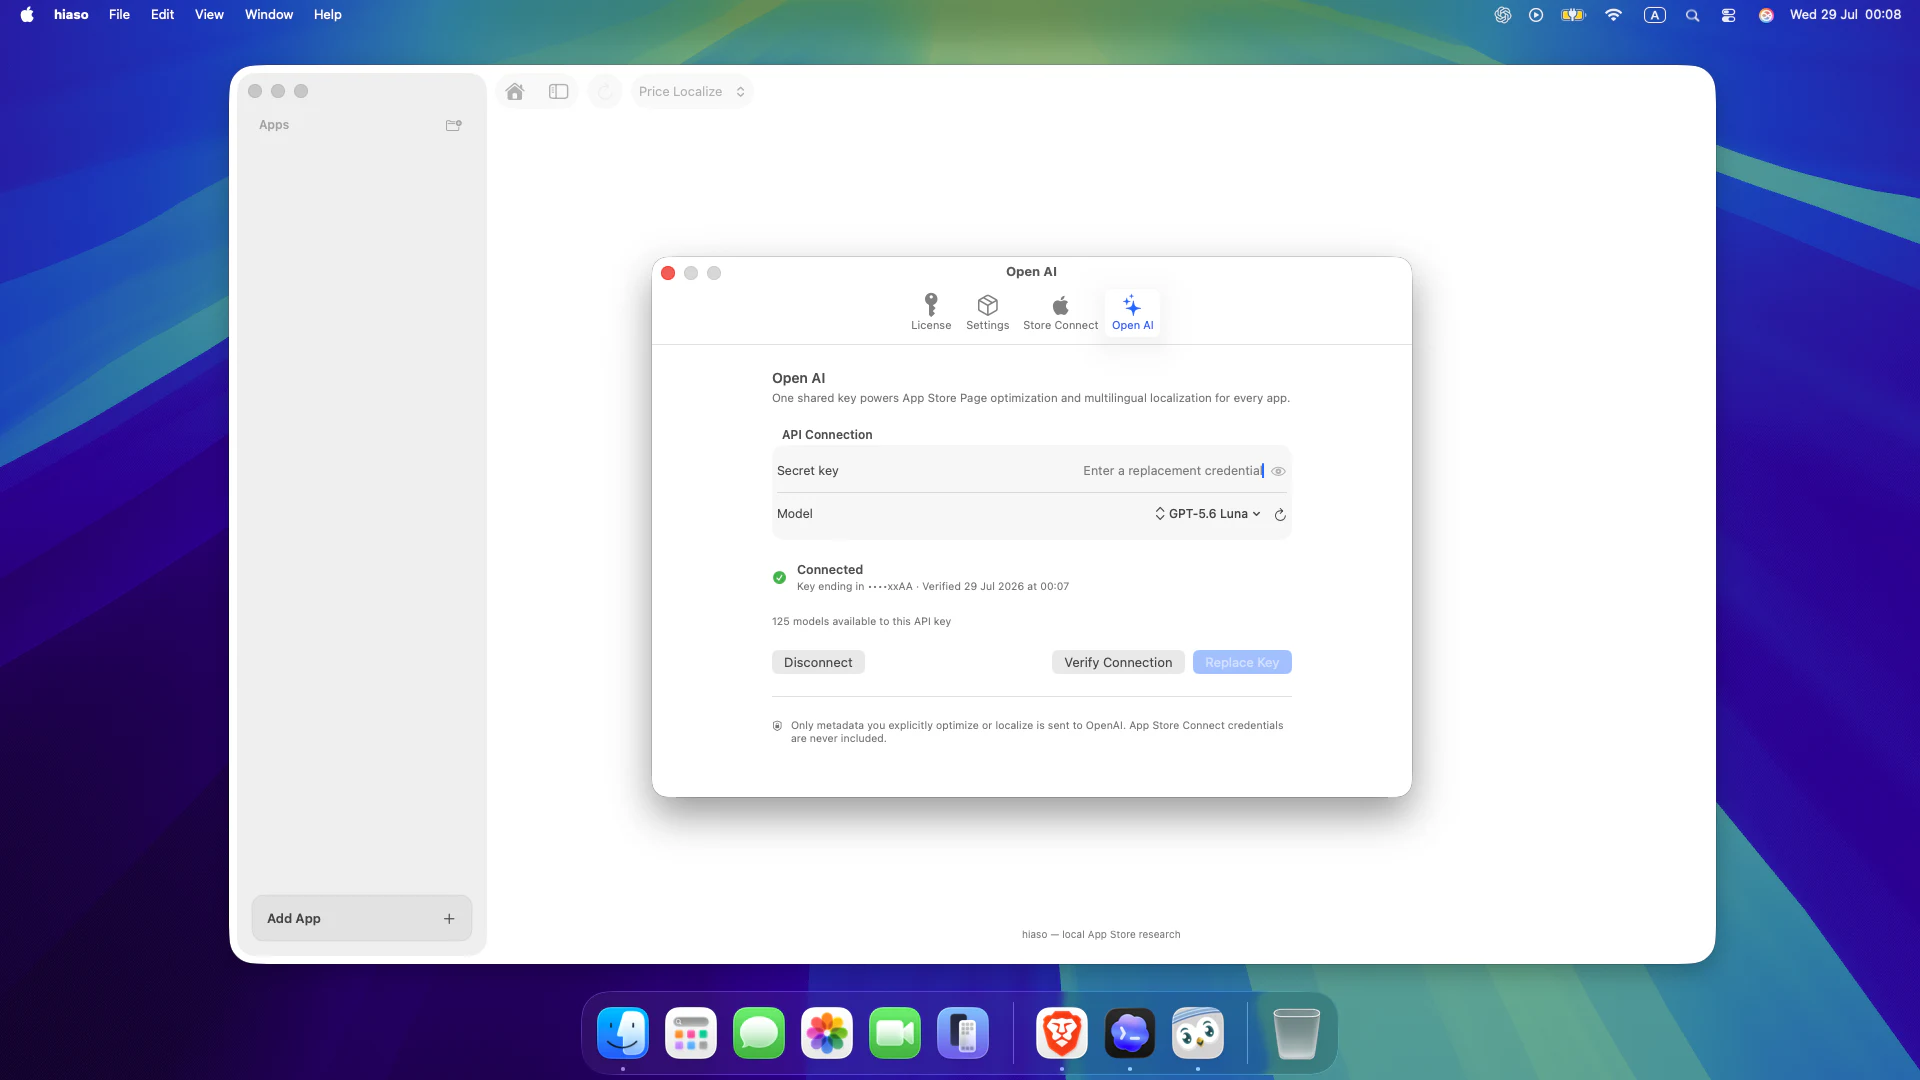
- Select Verify Connection. When connected, Hiaso shows the verified key ending and the models available to that key.
Connect App Store Connect
Connect Apple when you want to import live metadata, add localizations, validate Apple price points, or publish changes.
Generate a team key with App Manager access
You must be the Account Holder or an Admin to generate a team API key. If API access has never been enabled for the account, the Account Holder must request access first.
- Sign in to App Store Connect and open Users and Access.
- Select Integrations → App Store Connect API → Team Keys.
- Select Generate API Key. If another key already exists, use the plus button to add a new one.
- Give the key a recognizable name such as Hiaso.
- Under Access, select App Manager or a higher role. App Manager is the minimum recommended access because Hiaso works with pricing and App Store information.
- Select Generate. Copy the Issuer ID shown above the active-keys table and the new key’s Key ID.
- Select Download API Key to receive the private
.p8file, then store it somewhere secure.
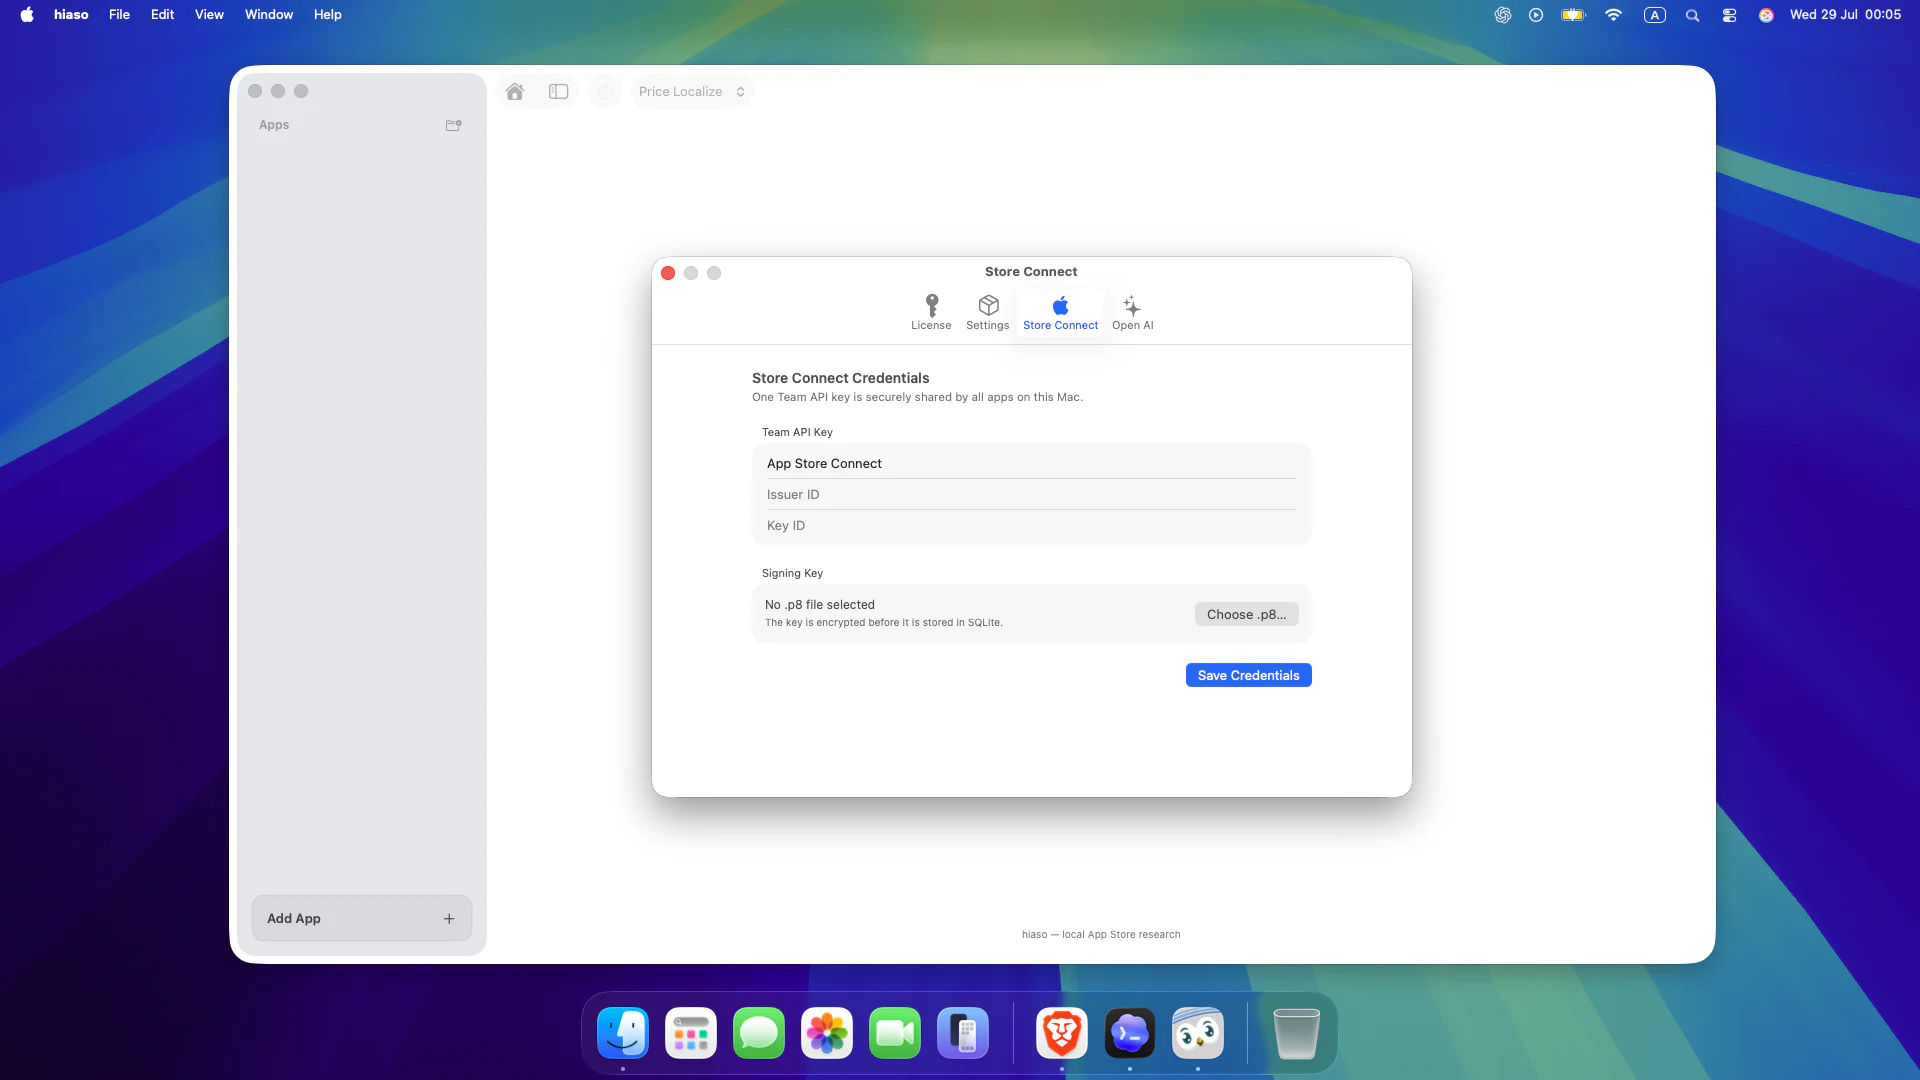
- Return to Hiaso and open Settings → Store Connect.
- Enter a recognizable key name, then paste the Issuer ID and Key ID you copied from App Store Connect.
- Choose the downloaded
.p8signing-key file, then select Save Credentials.
Further reading: Apple’s App Store Connect API guide and RevenueCat’s illustrated key-configuration guide.
Add the app you want to optimize
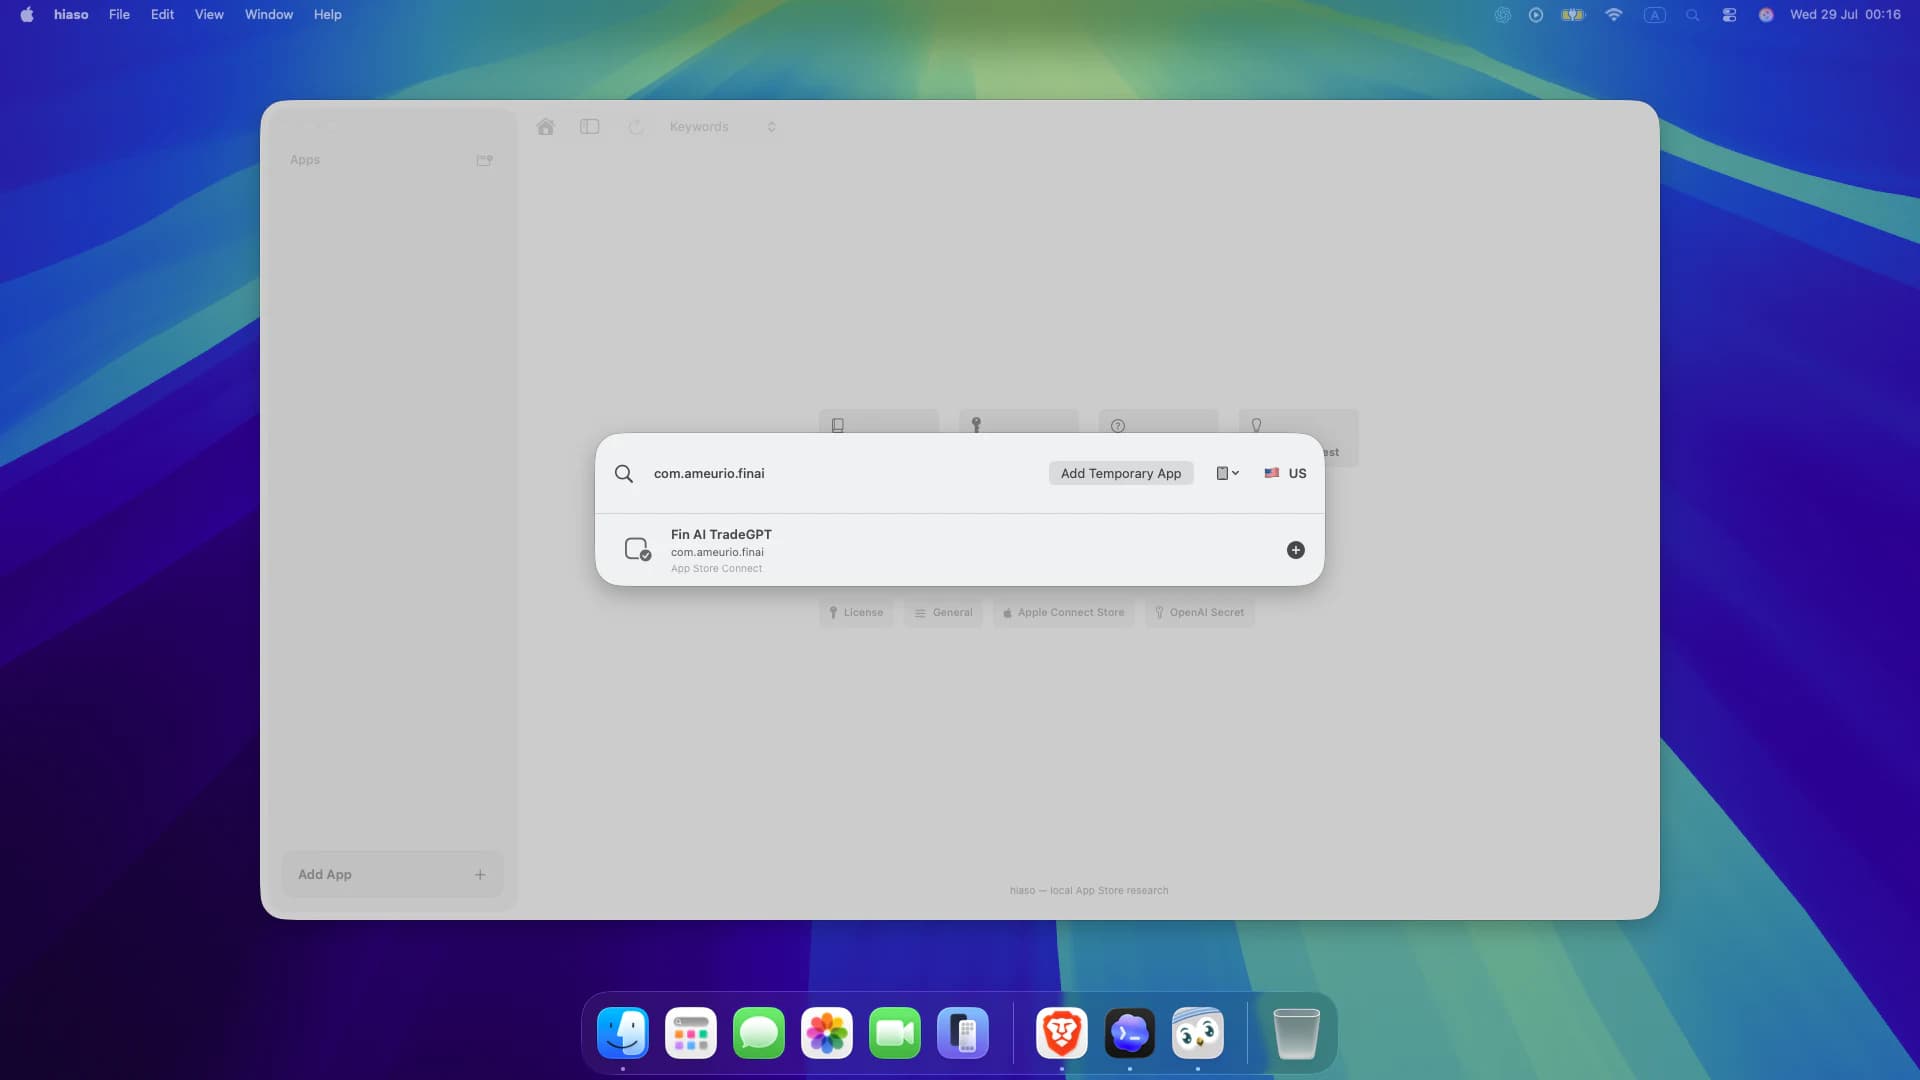
You can find a published App Store app by name or identify your own app precisely by bundle ID.
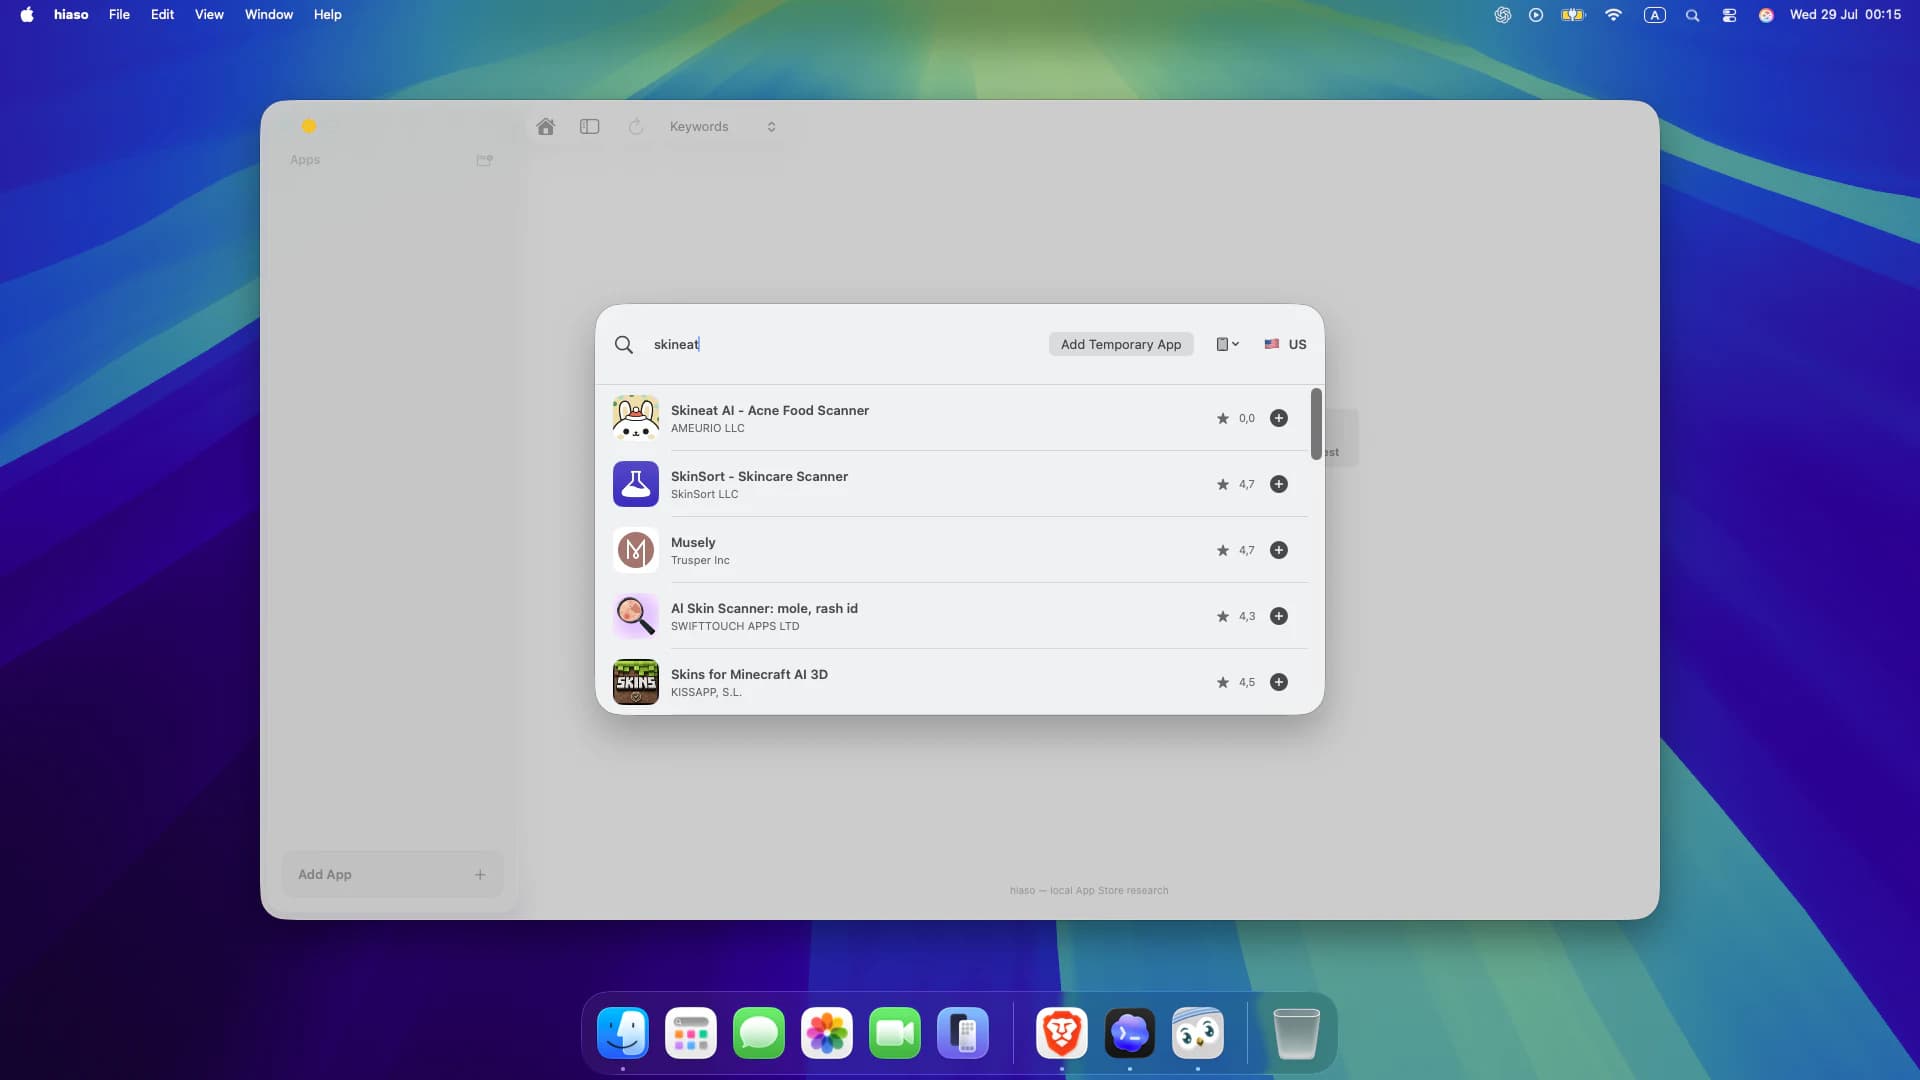
- Select Add App in the sidebar.
- Search by app name for discovery work, or enter the bundle ID when linking your own App Store Connect app.
- Confirm the platform and storefront, then select the plus button beside the correct result.
- If the app is not on the store yet, use Add Temporary App to begin research before launch.
Research keywords and competitors
Build a focused keyword set by comparing demand, difficulty, attainable ranking positions and the apps already winning each search.
- Switch the workspace selector to Keywords and choose the country you want to research.
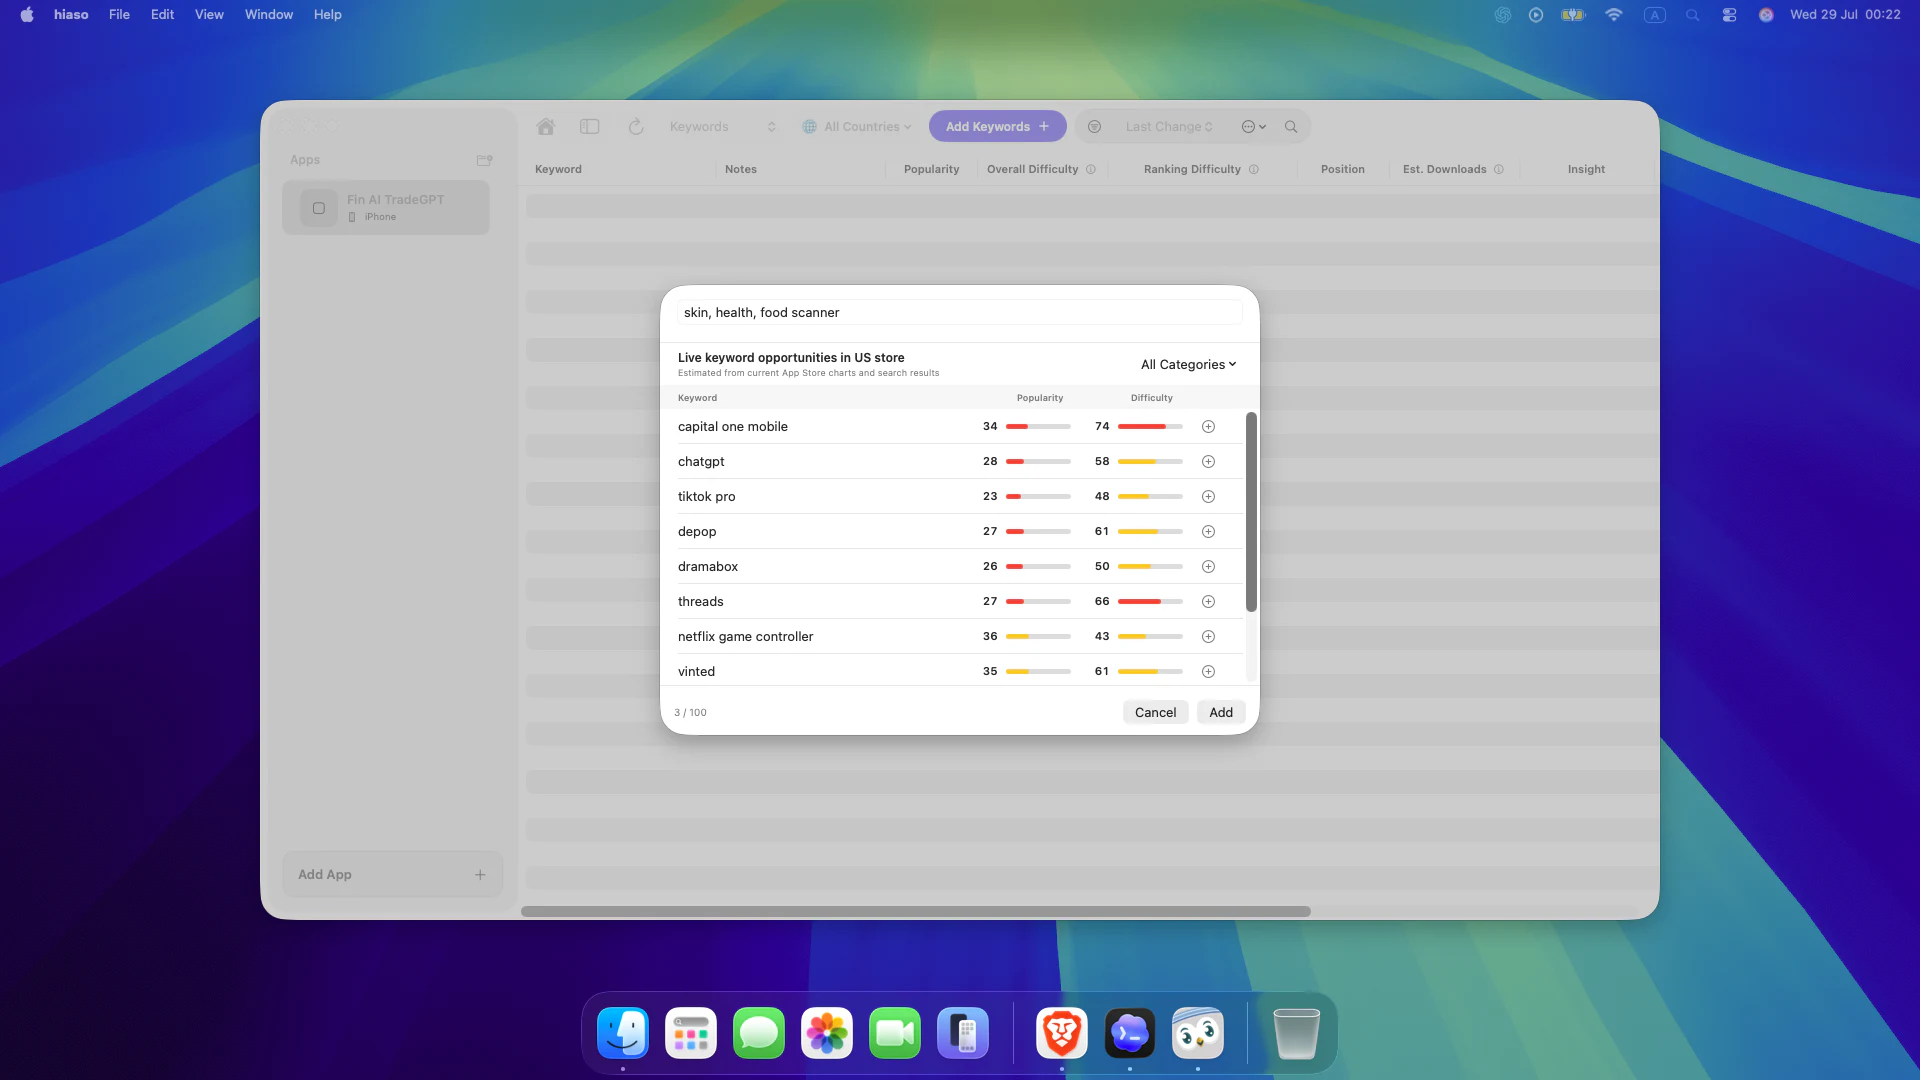
- Select Add Keywords. Enter seed terms separated by commas and review live opportunities before adding them.
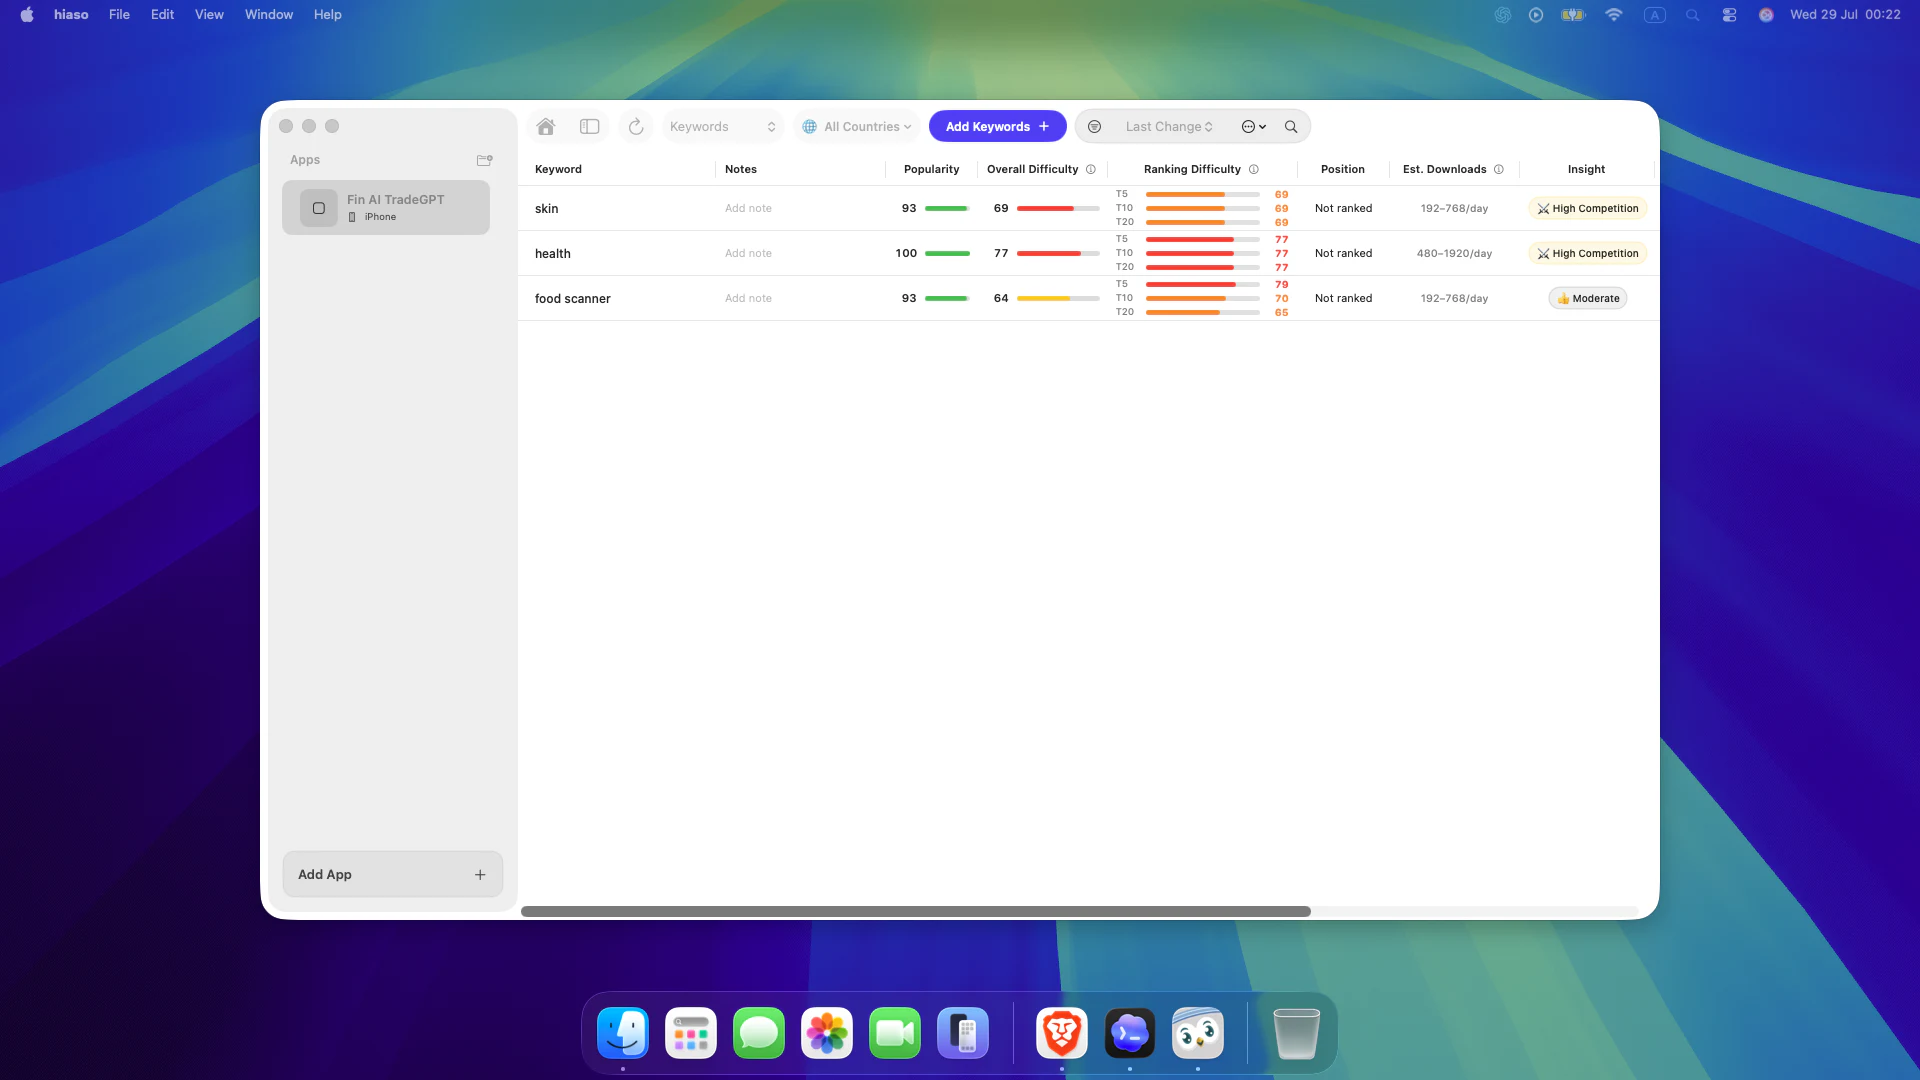
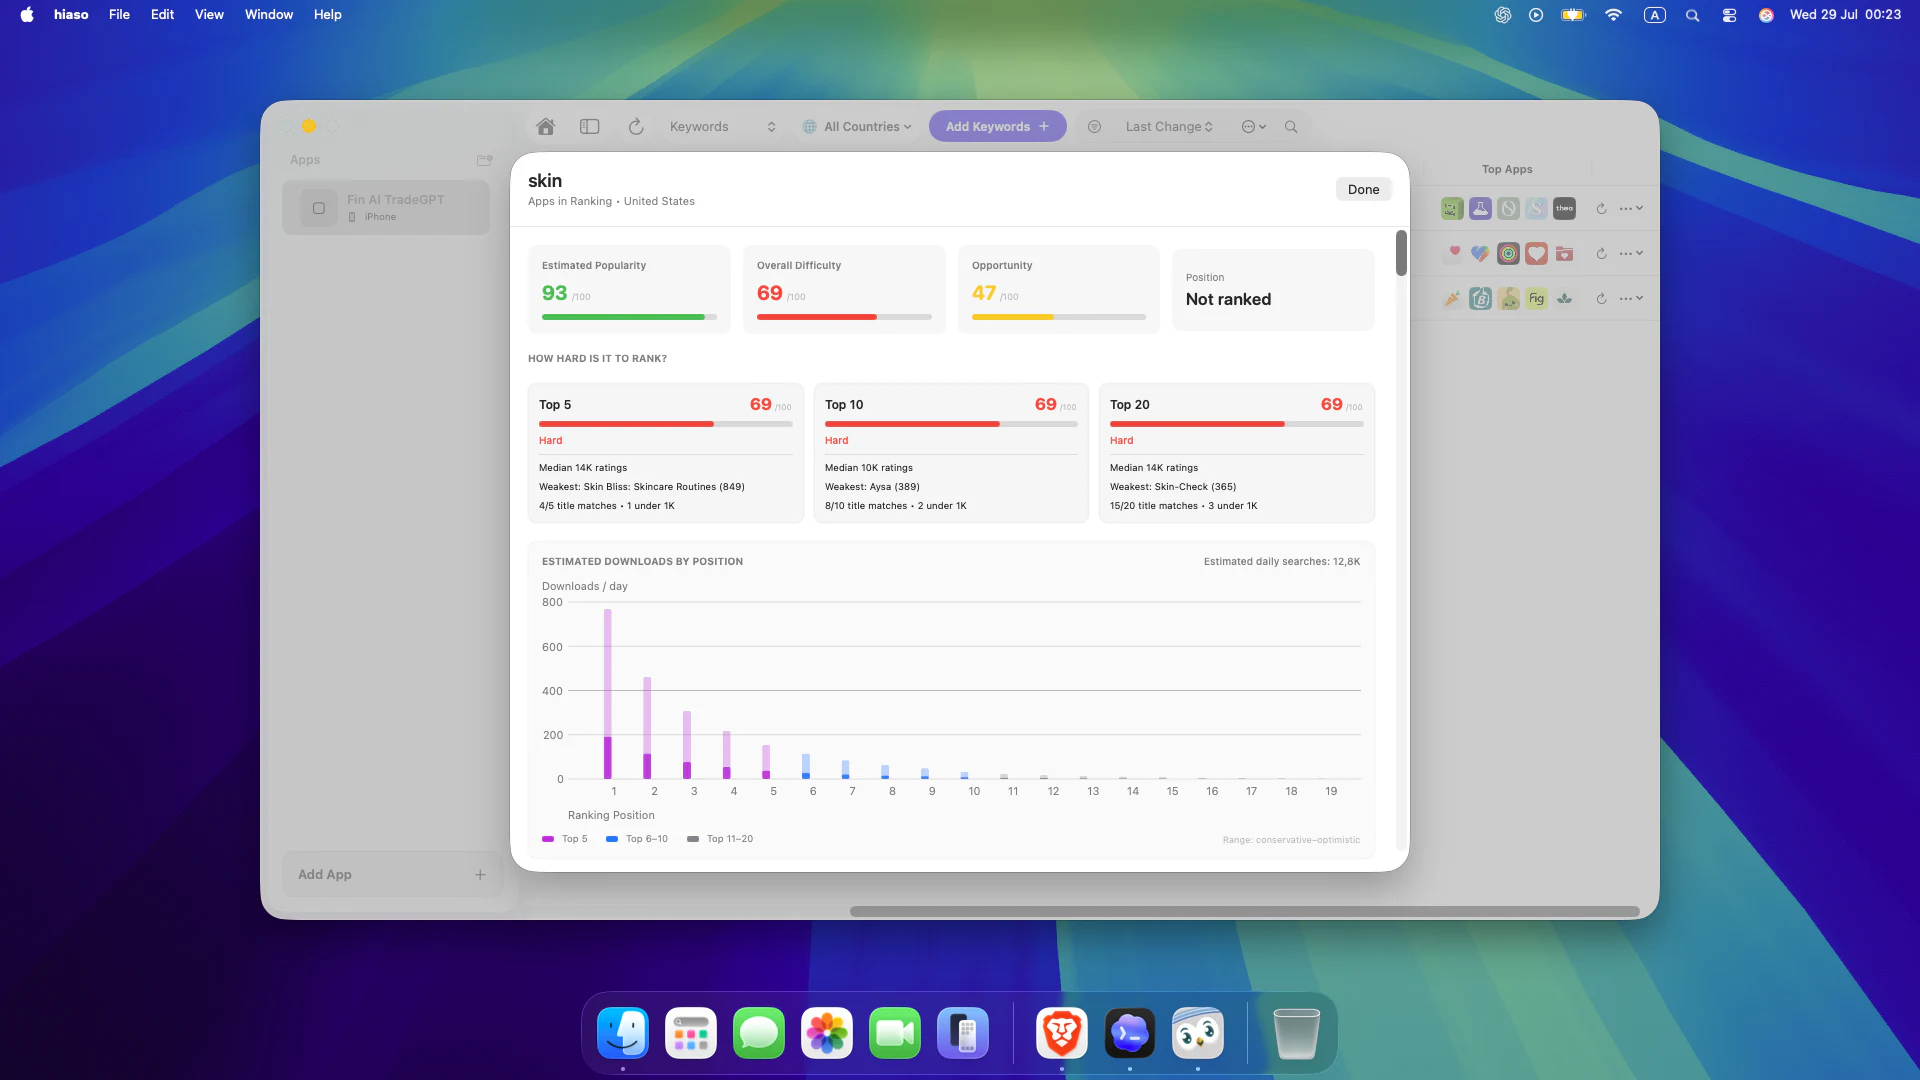
- Compare Popularity, Overall Difficulty, Top 5/10/20 difficulty, current Position and Estimated Downloads.
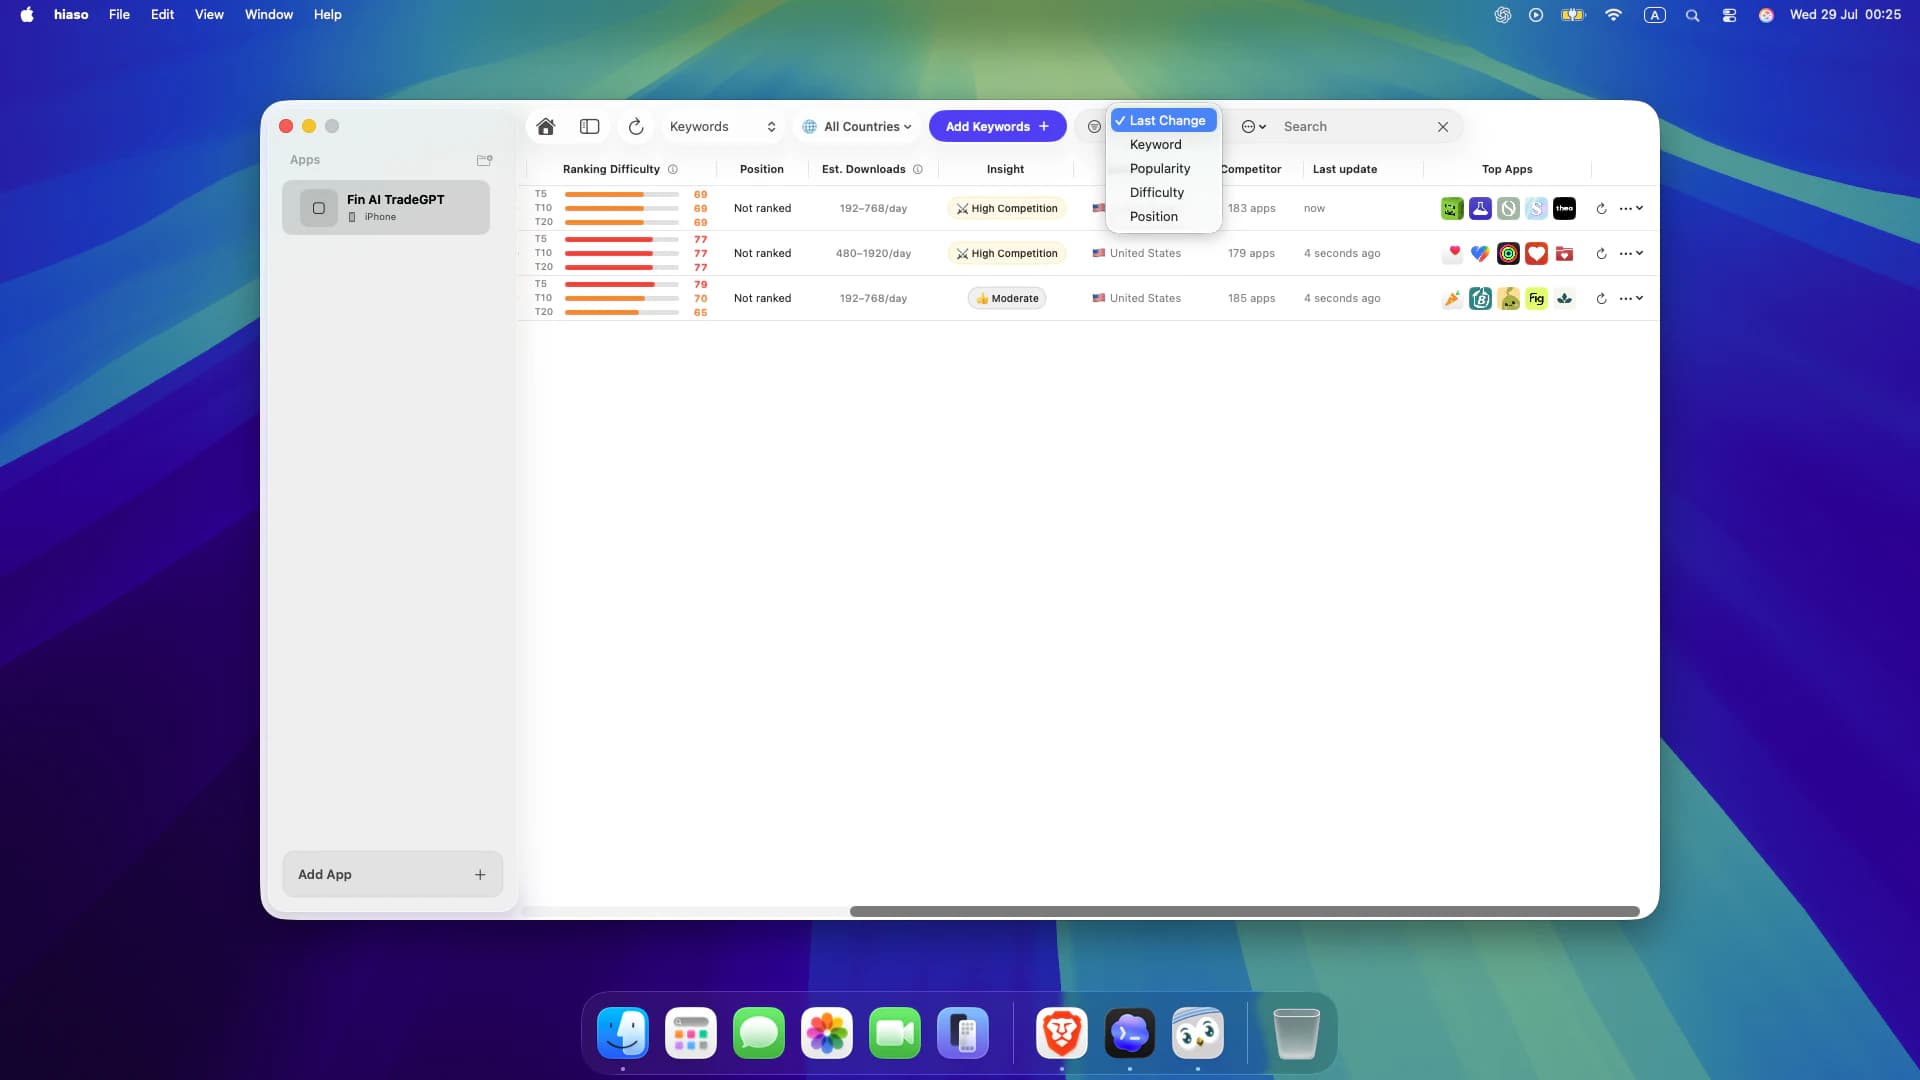
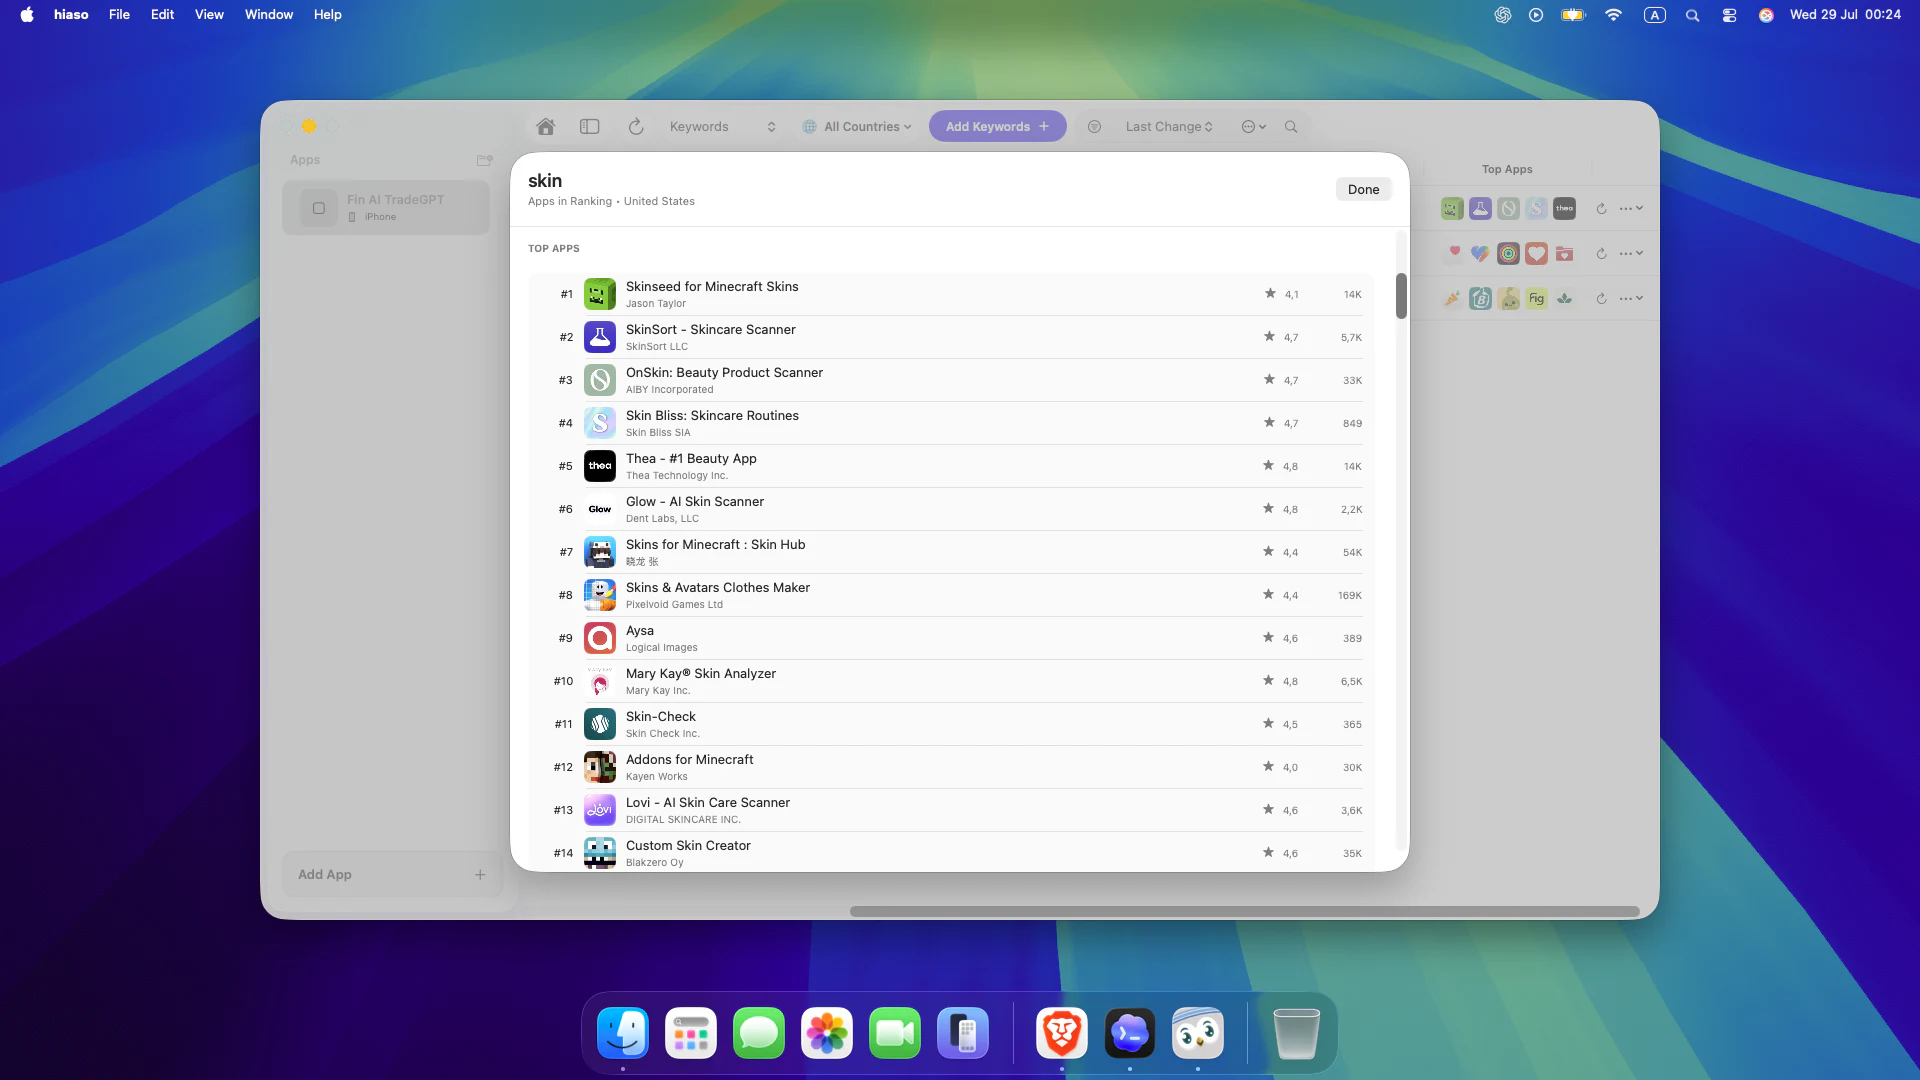
- Use sort, filters and search to find realistic opportunities. Select a keyword to inspect its demand curve and ranking apps.
- Open Top Apps to study titles, icons, ratings and competitors that repeatedly appear for the term.
Turn research into stronger App Store metadata
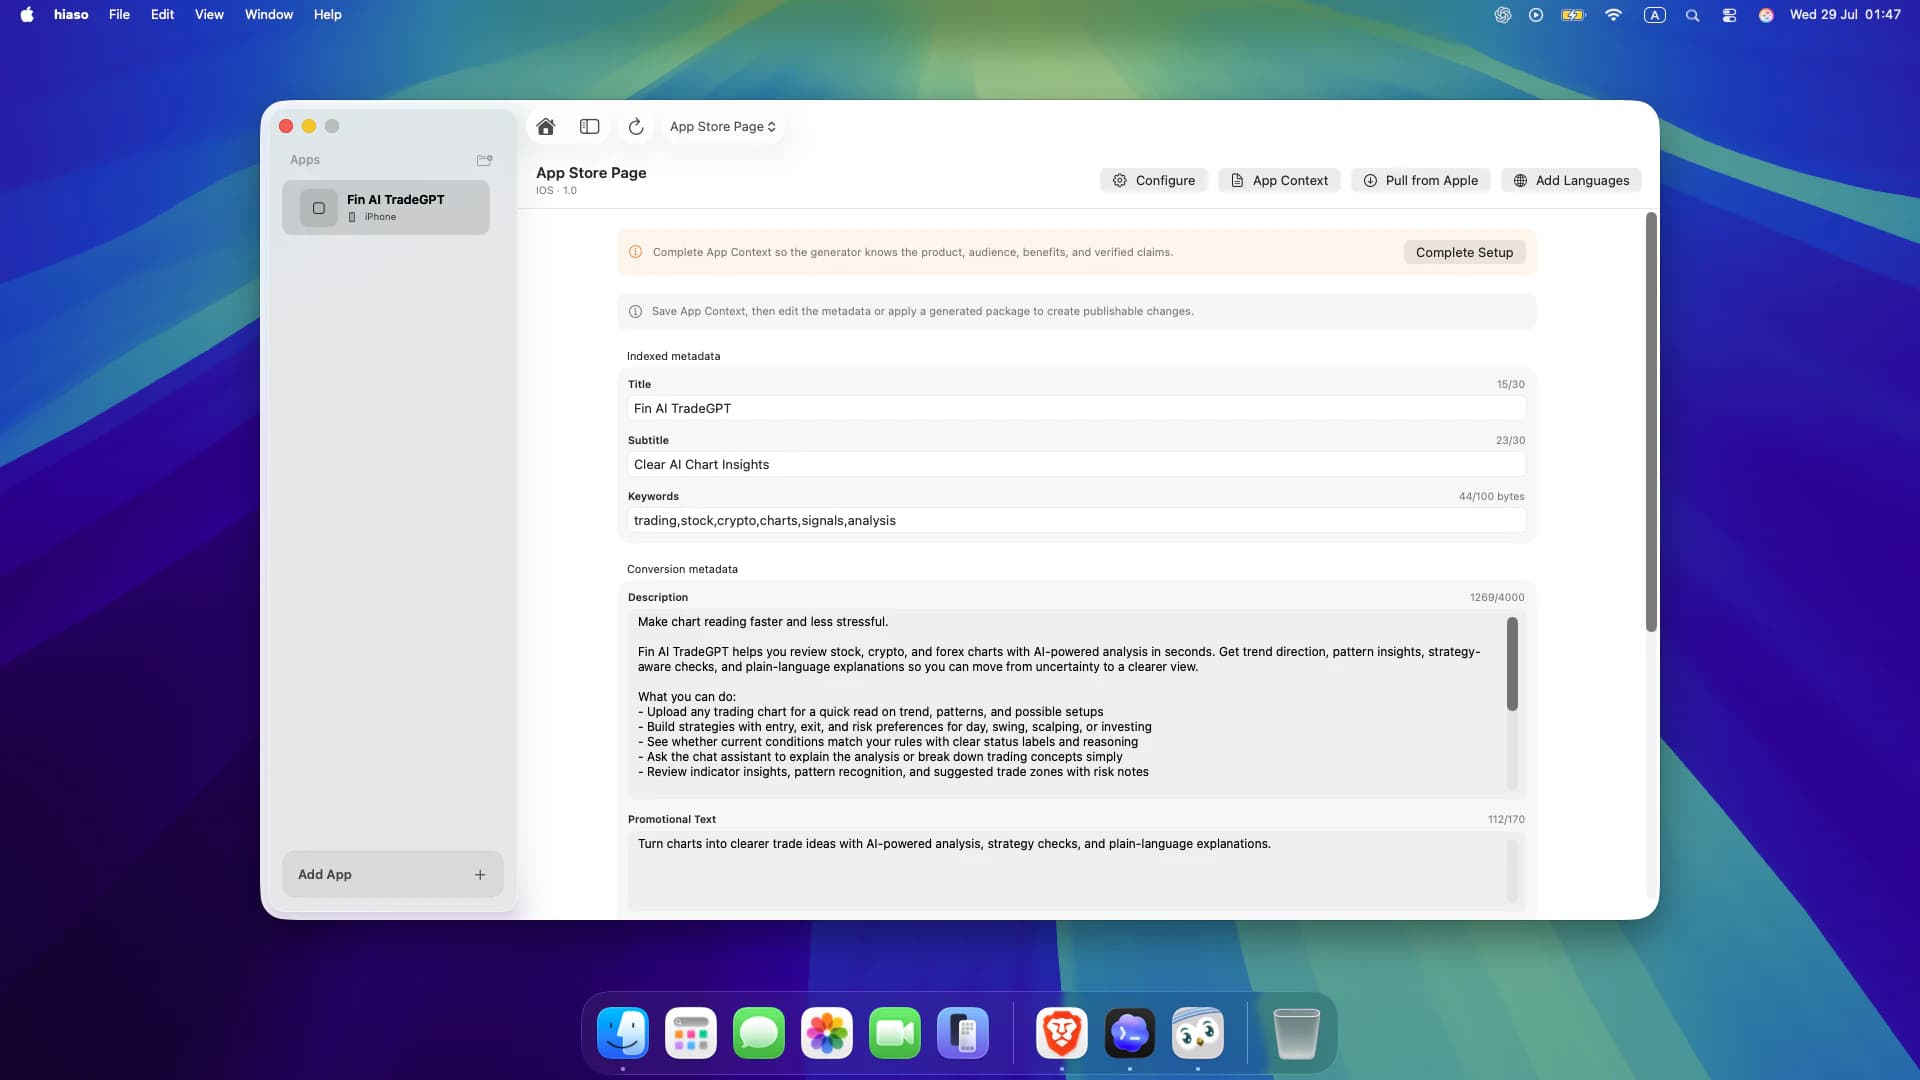
The App Store Page workspace brings your title, subtitle, keywords, description and promotional text together with product context and AI-generated packages.
- Switch to App Store Page. Use Pull from Apple if you want to start from the current live listing.
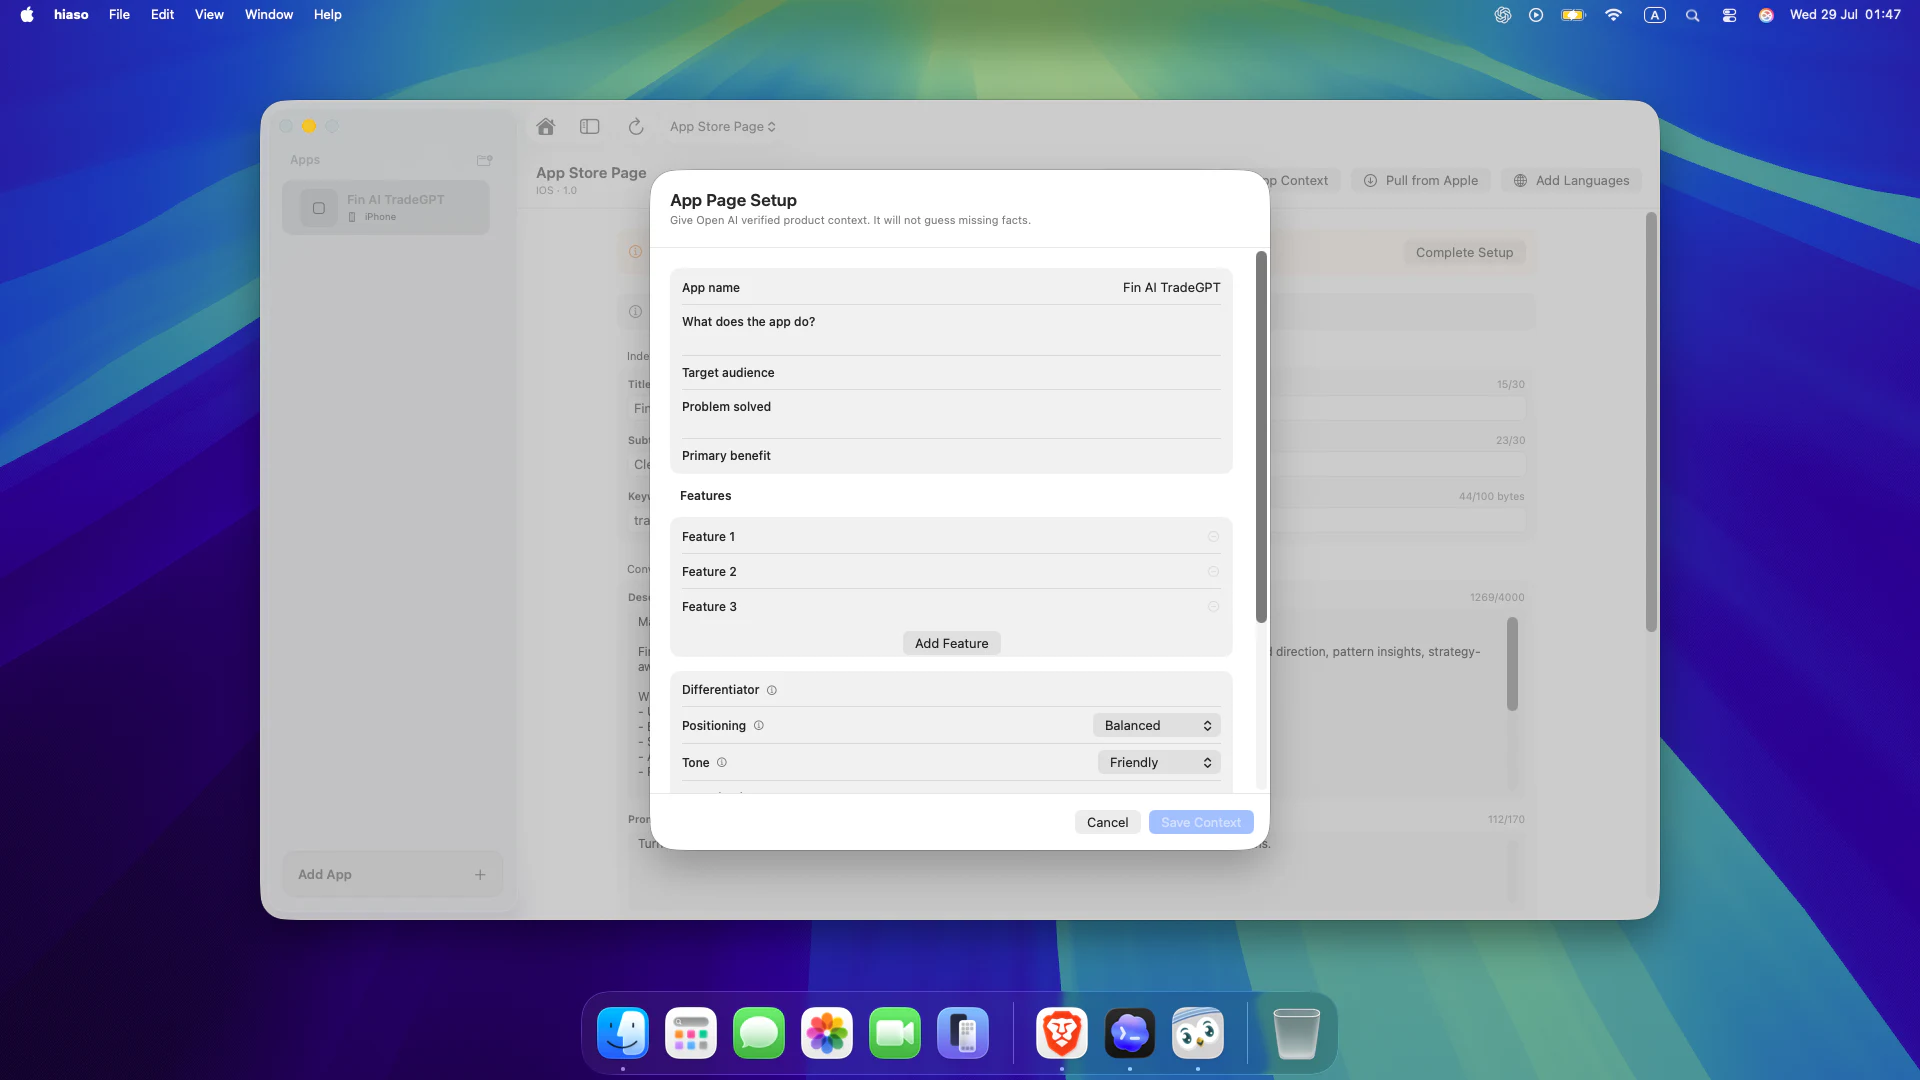
- Select App Context and describe what the app does, its audience, problem, primary benefit, features, differentiator, positioning and tone.
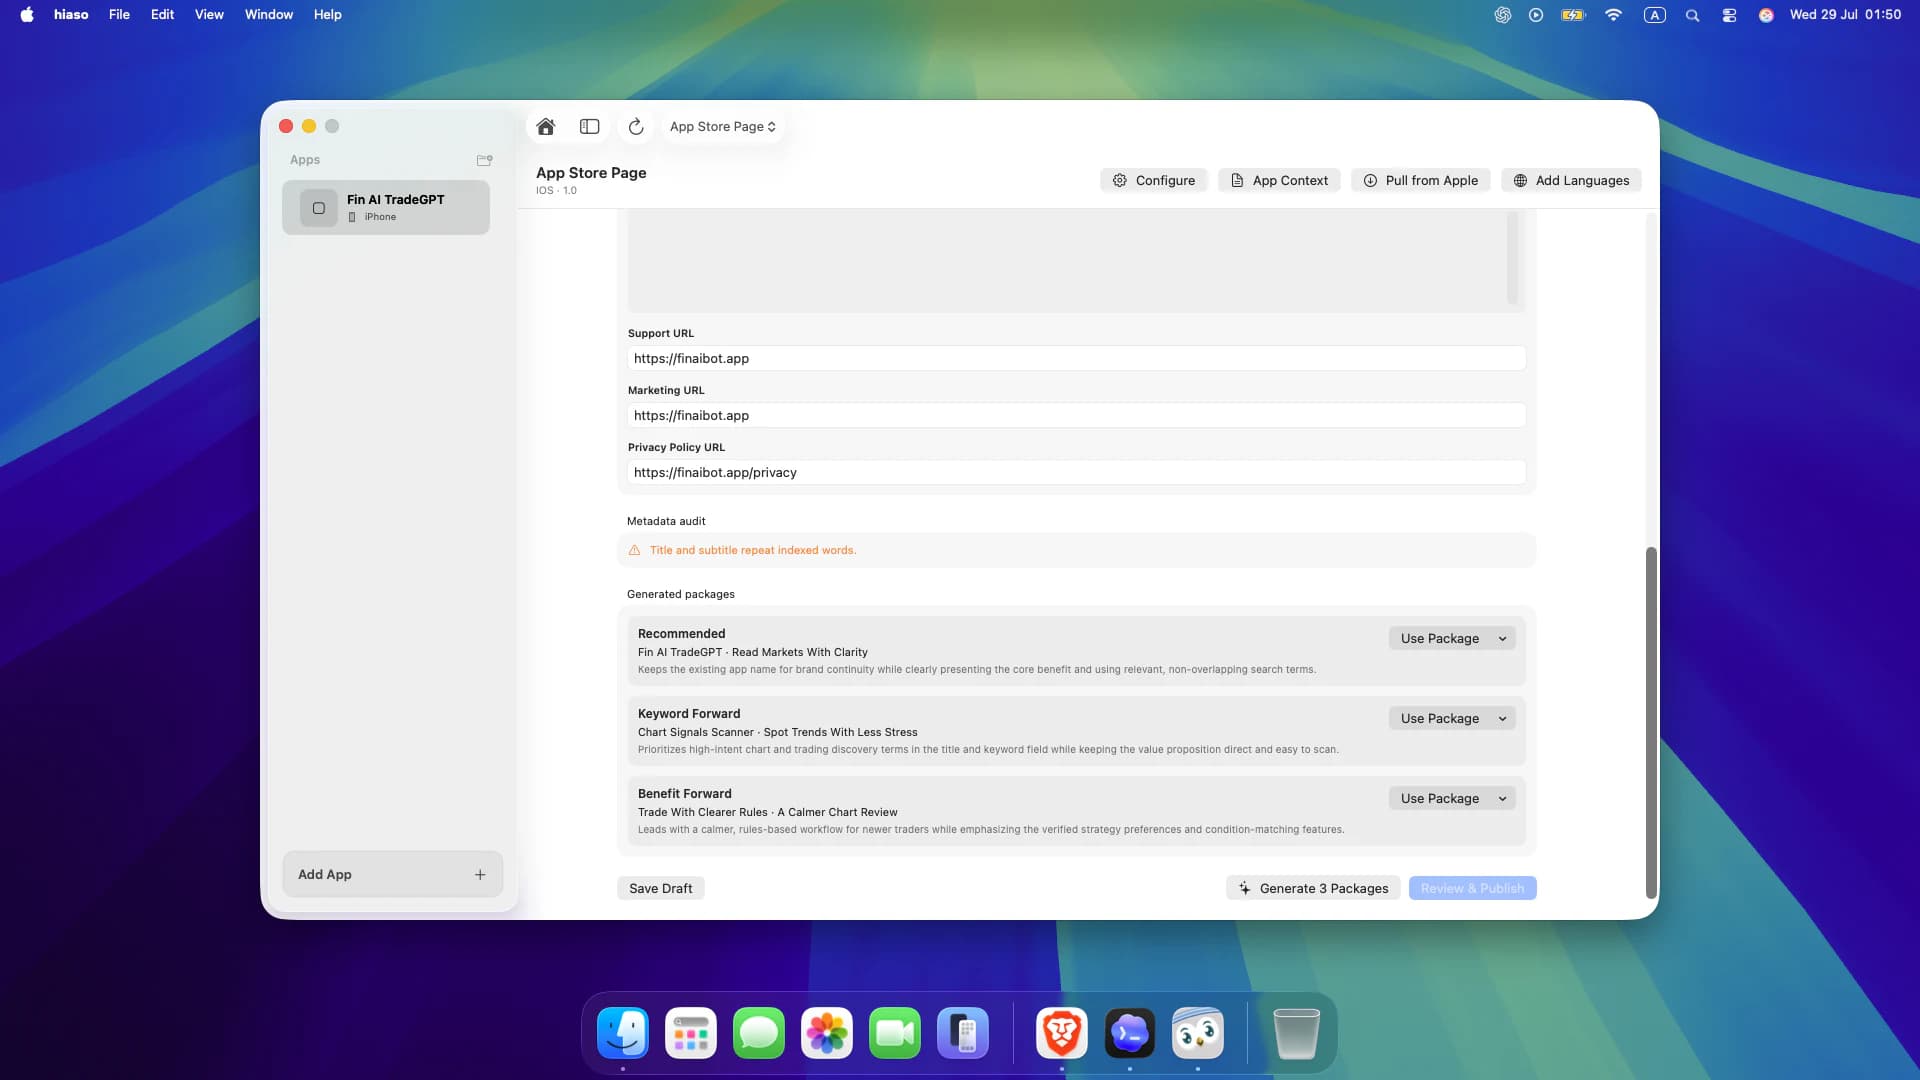
- Save the context, then select Generate 3 Packages. Compare Recommended, Keyword Forward and Benefit Forward options.
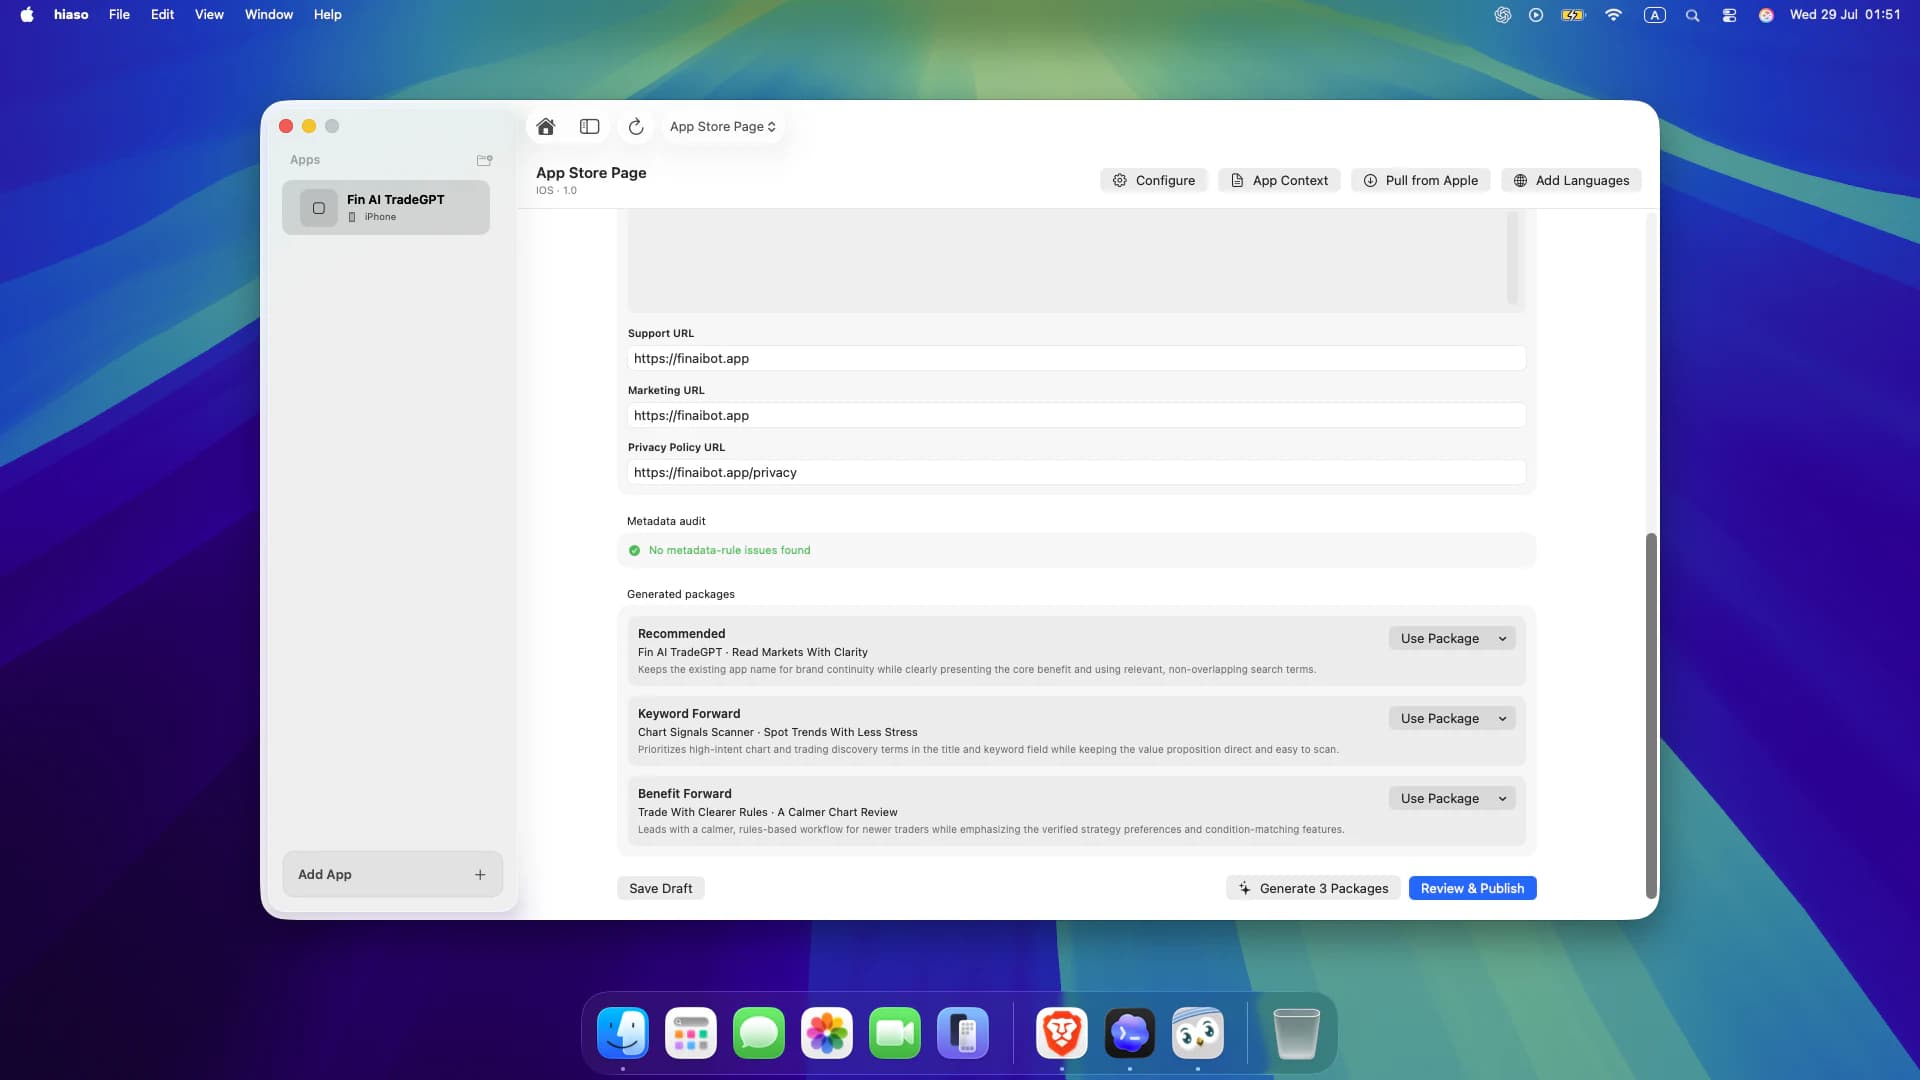
- Select Use Package for the direction you prefer. Review the metadata audit and edit anything that is inaccurate or duplicated.
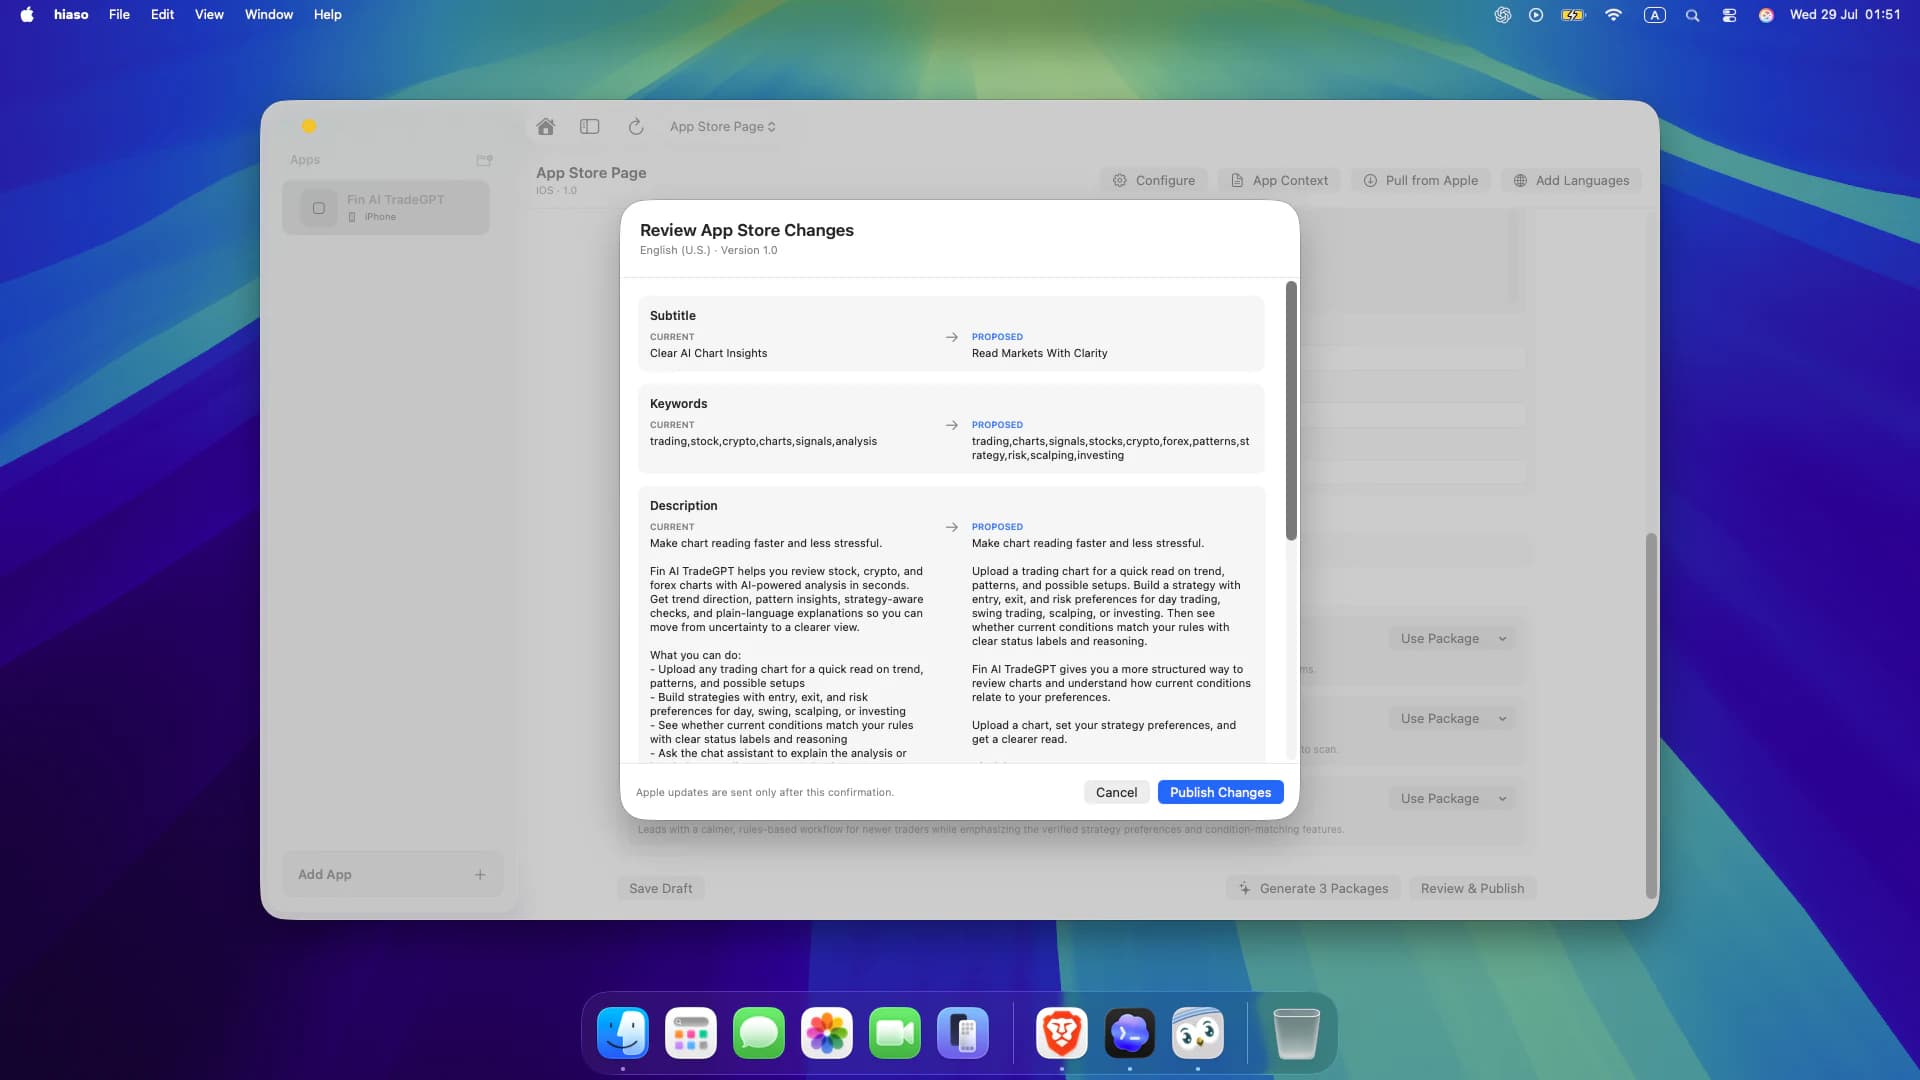
- Select Review & Publish. Compare every Current and Proposed field before confirming Publish Changes.
Add localized App Store languages
Create complete localization drafts from the source listing, then review each market independently before publishing.
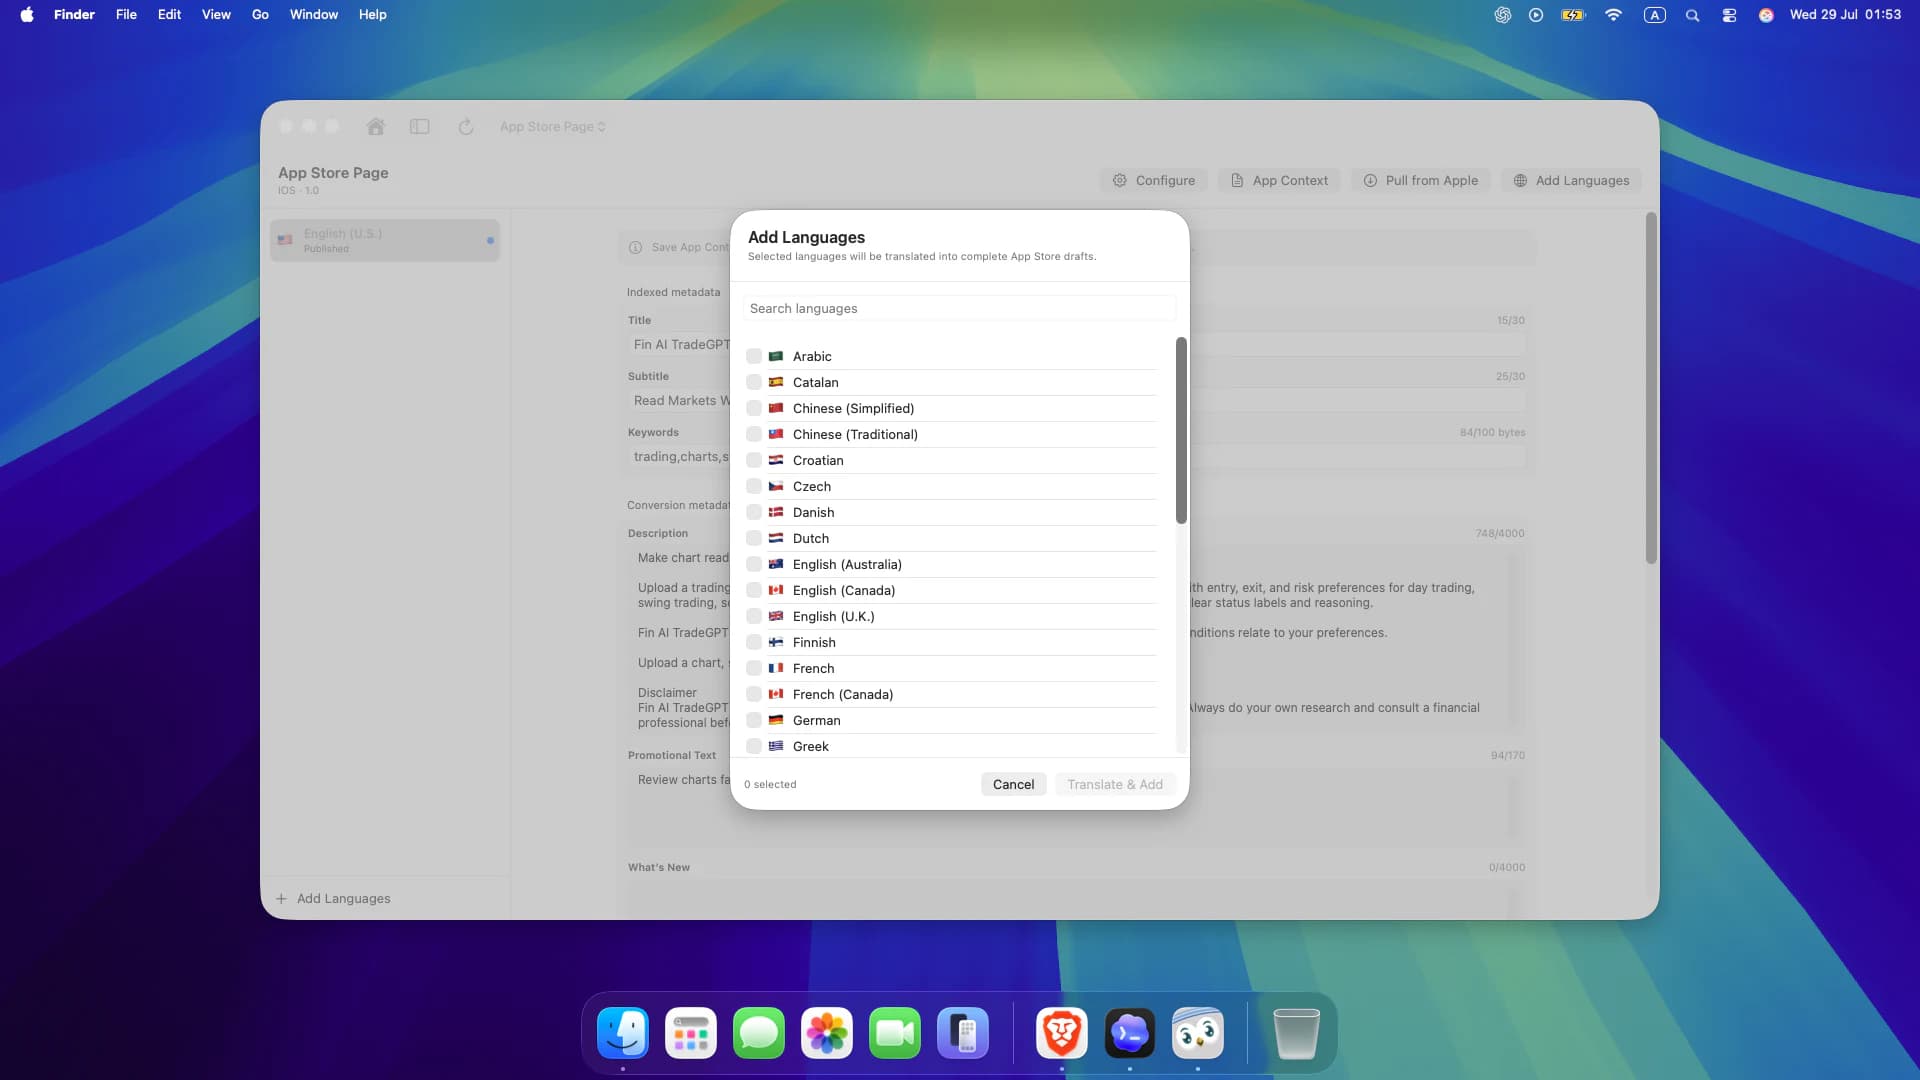
- From App Store Page, select Add Languages.
- Search or scroll for the locales you want and select their checkboxes.
- Select Translate & Add, then inspect the title, subtitle, keywords, description and promotional text for every locale.
- Adapt search language and positioning where necessary; literal translation is not always good ASO.
Localize and publish App Store prices
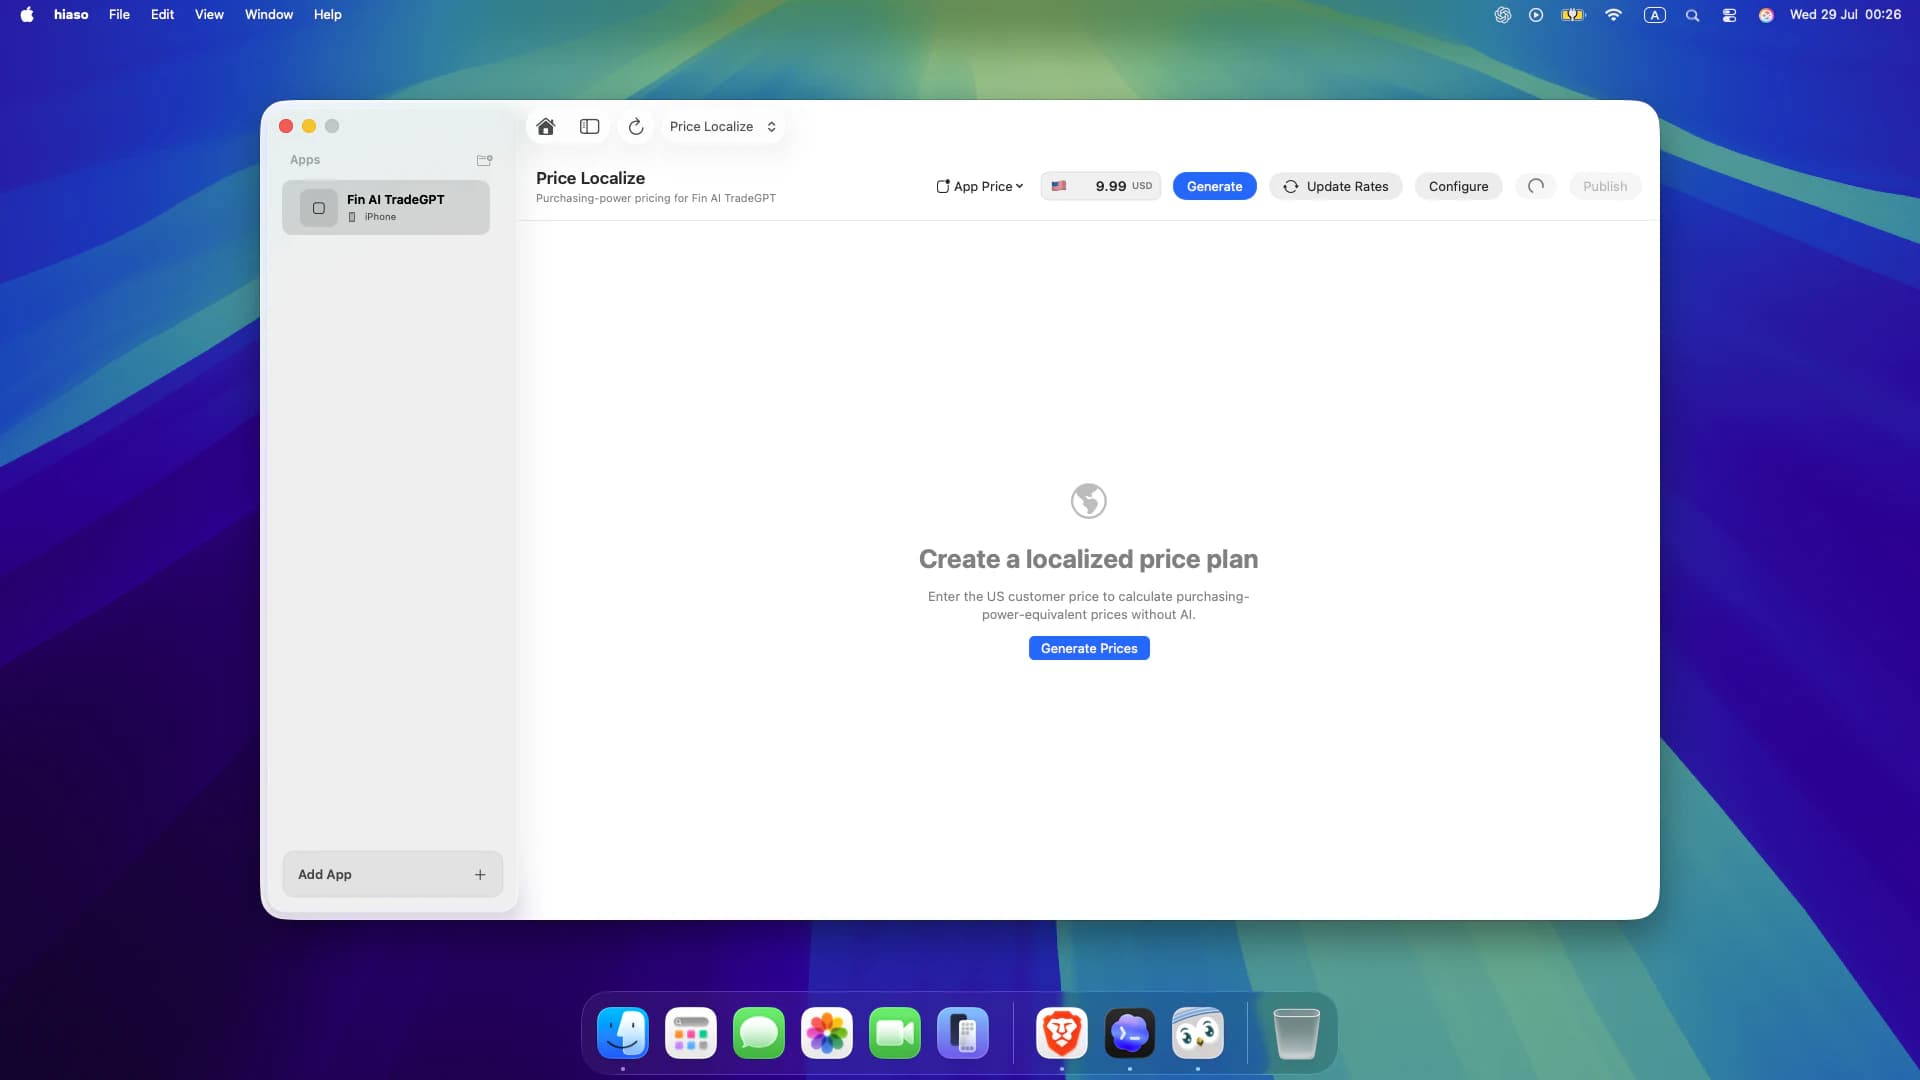
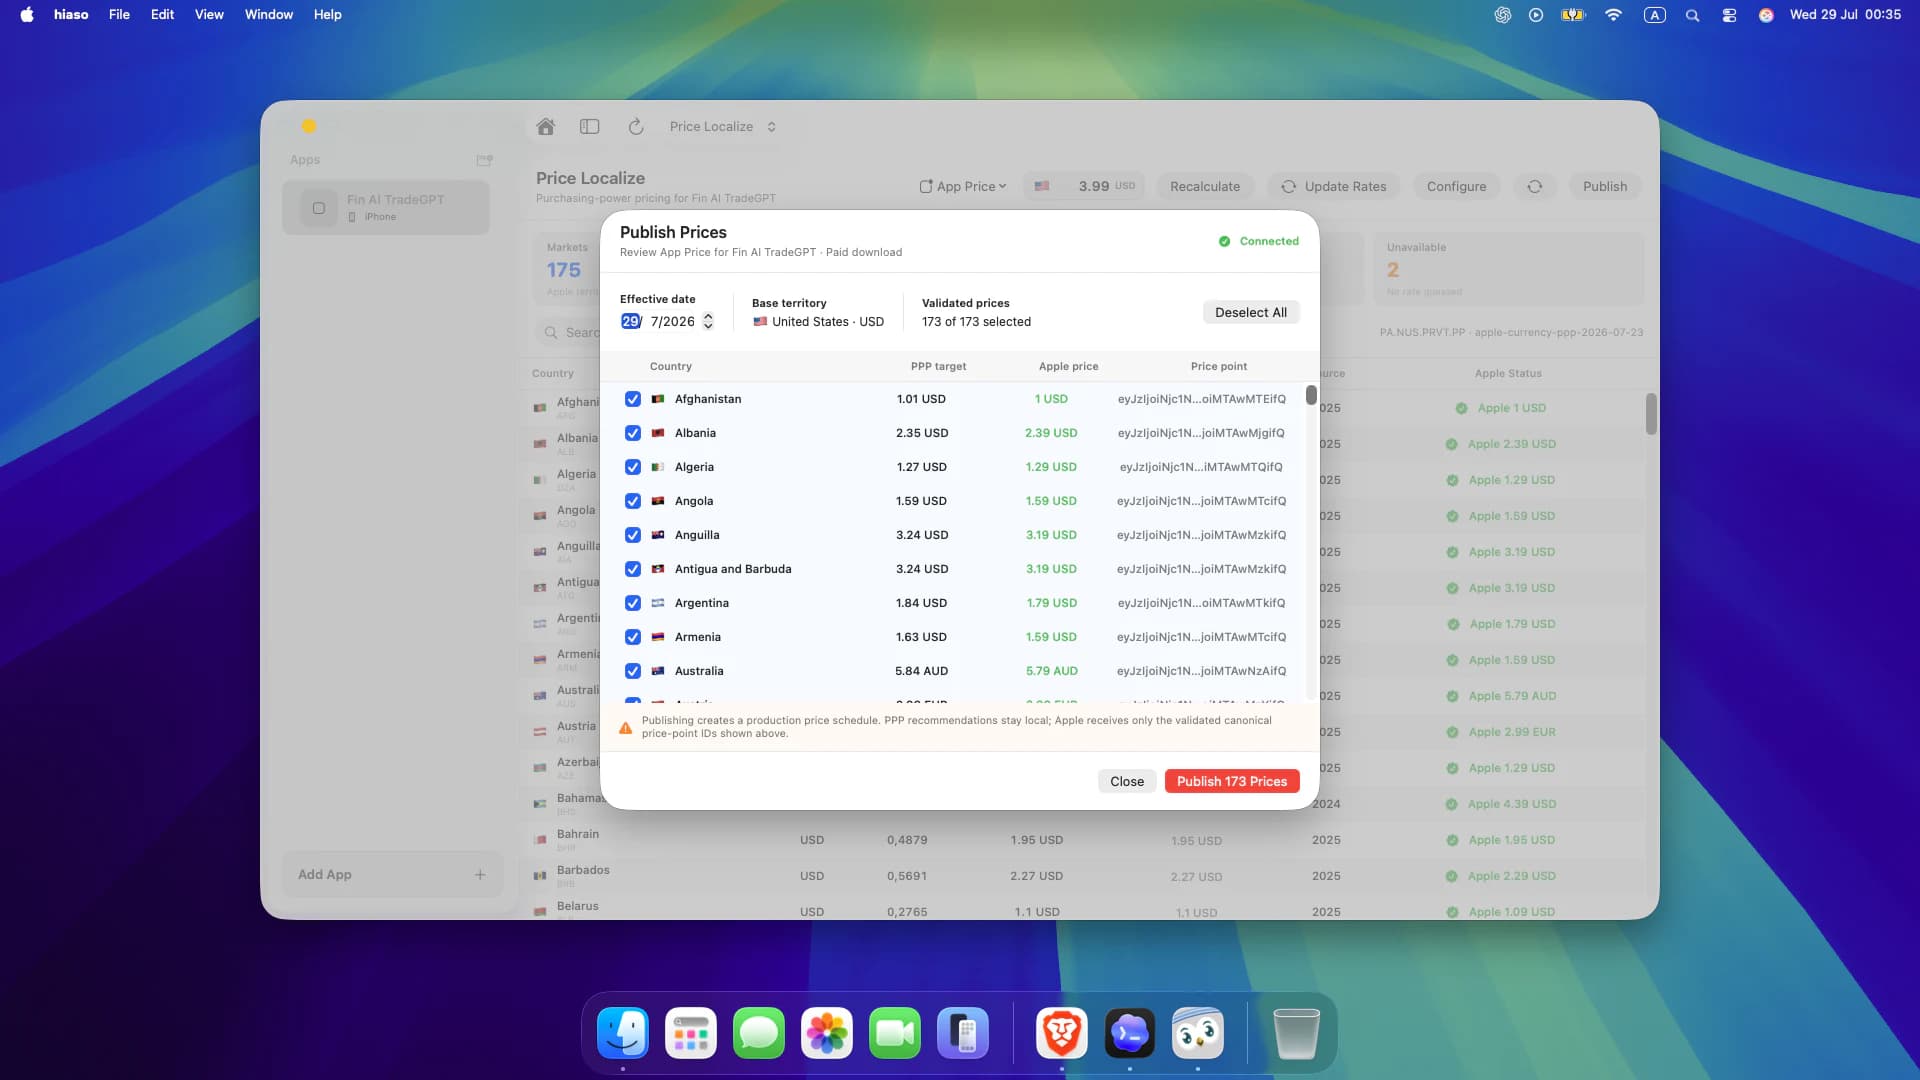
Hiaso creates purchasing-power-equivalent targets, matches them to Apple’s available price points, and lets you review every territory before publishing.
- Switch to Price Localize, choose App Price or a subscription, then enter the base-territory customer price.
- Select Generate Prices. Review the PPP target for each market and apply overrides where your strategy needs them.
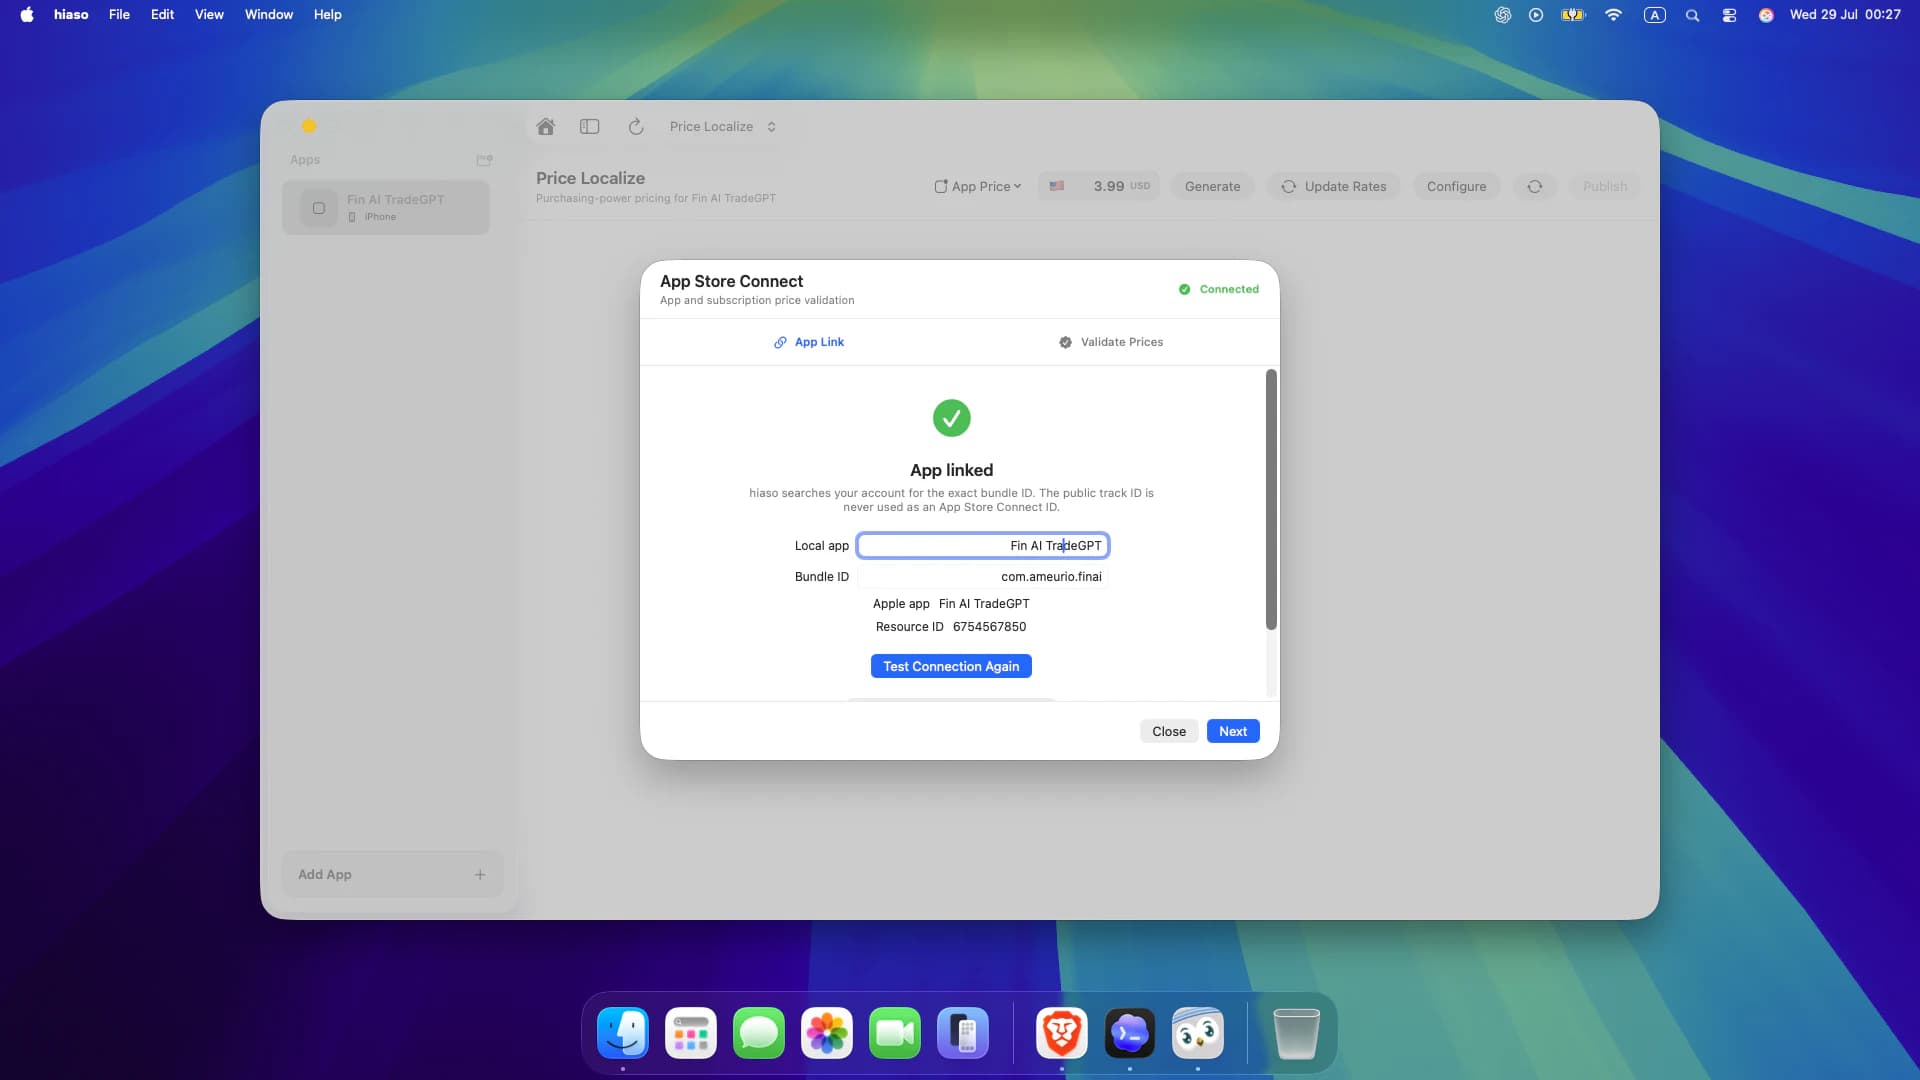
- Select Configure and confirm the local app is linked to the exact Apple app by bundle ID.
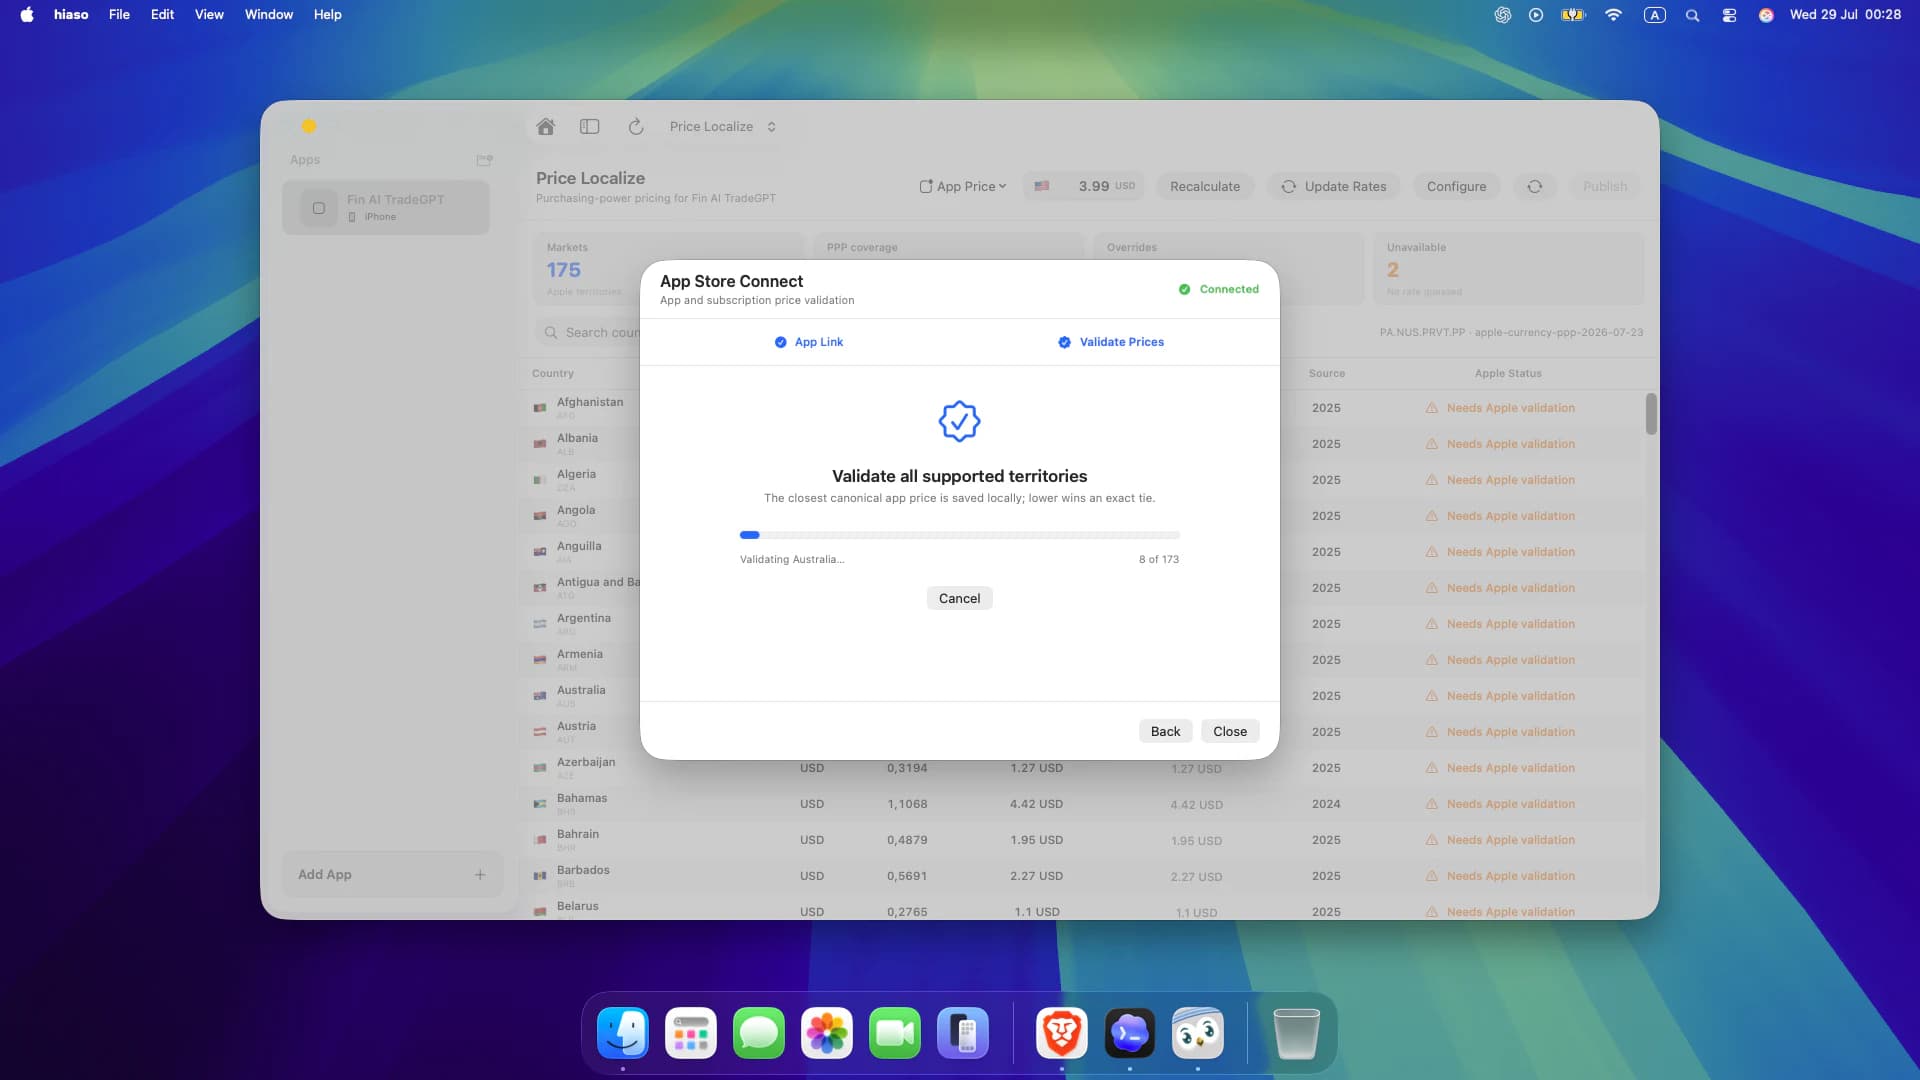
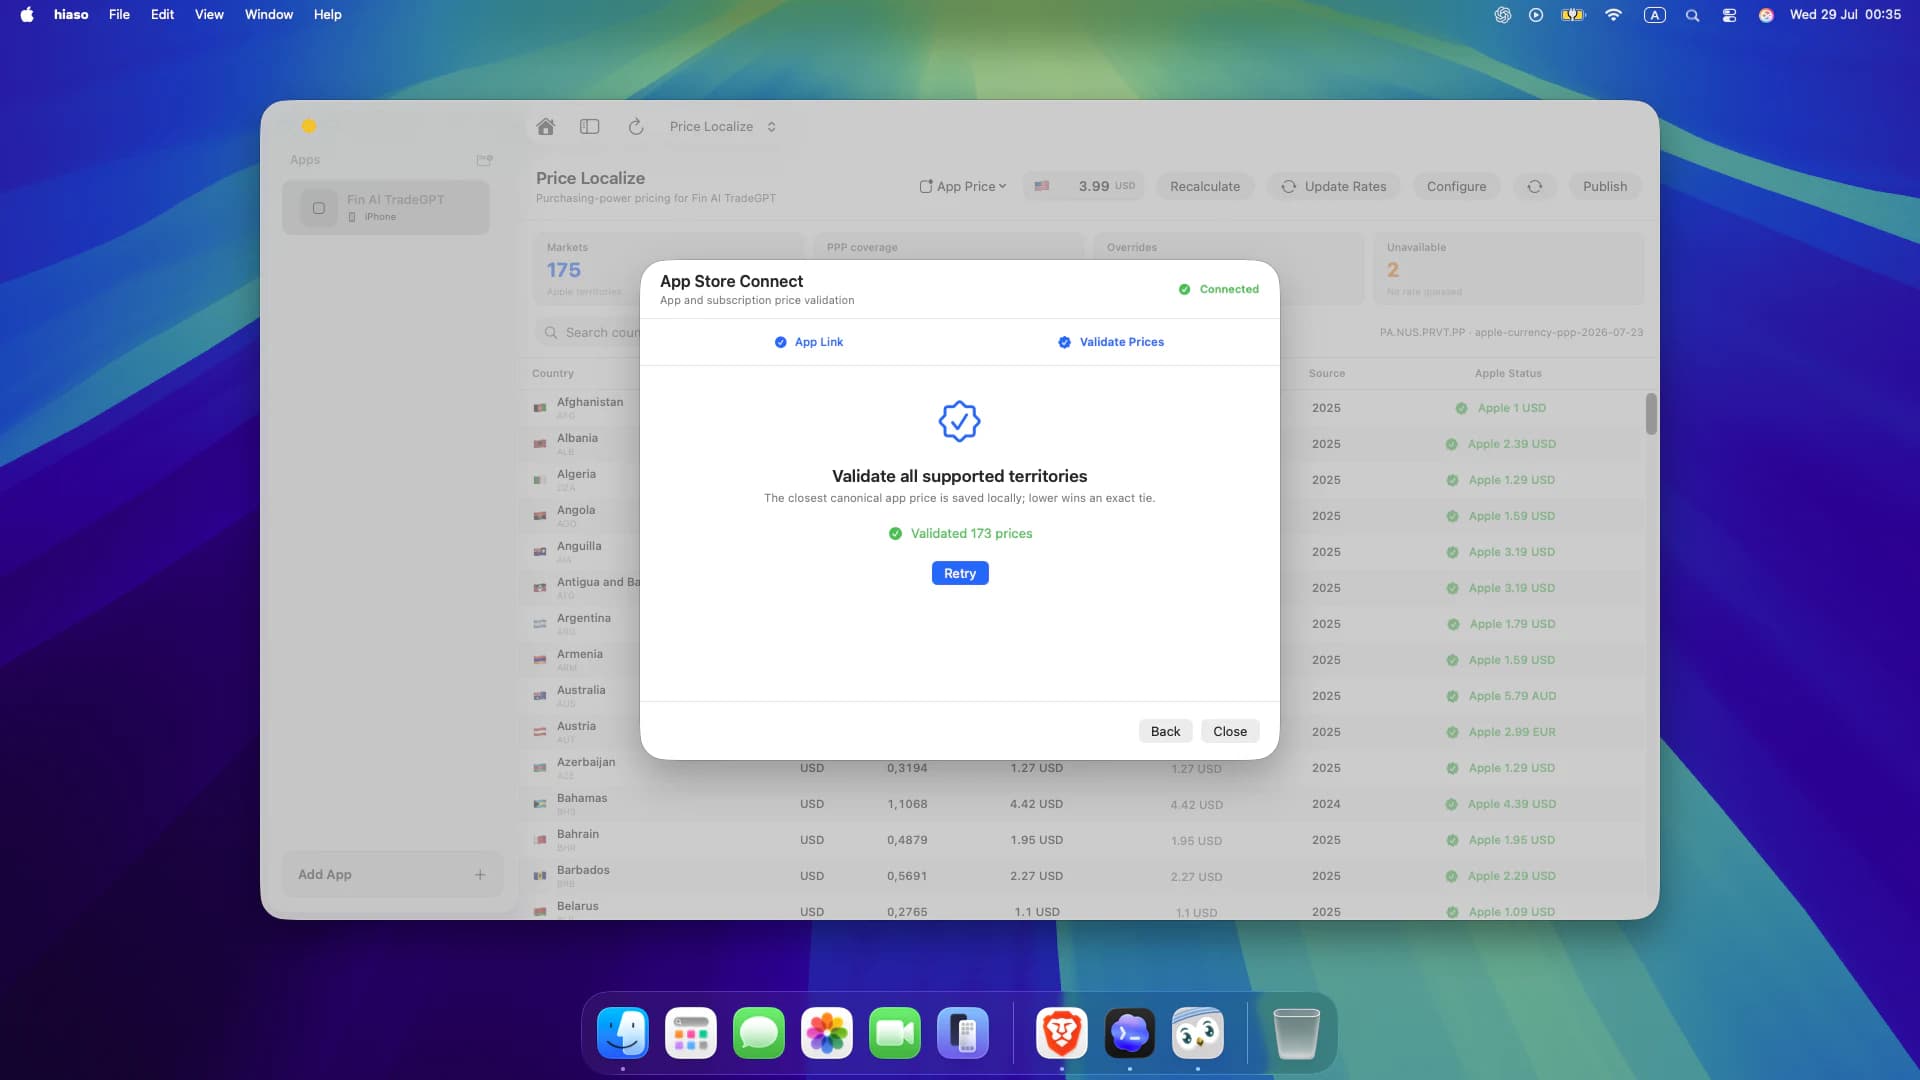
- Run Validate Prices. Hiaso maps every supported territory to Apple’s closest canonical price point; when two points are equally close, the lower price wins.
- Review the validated results, select Publish, check the included territories and confirm only when the schedule is correct.
A repeatable Hiaso workflow
Research one market, choose defensible keywords, ground AI in verified product context, review every proposed change, then publish and measure. Repeat the process for each storefront instead of treating ASO as a one-time task.